RapidCompact is now RapidPipeline - learn more
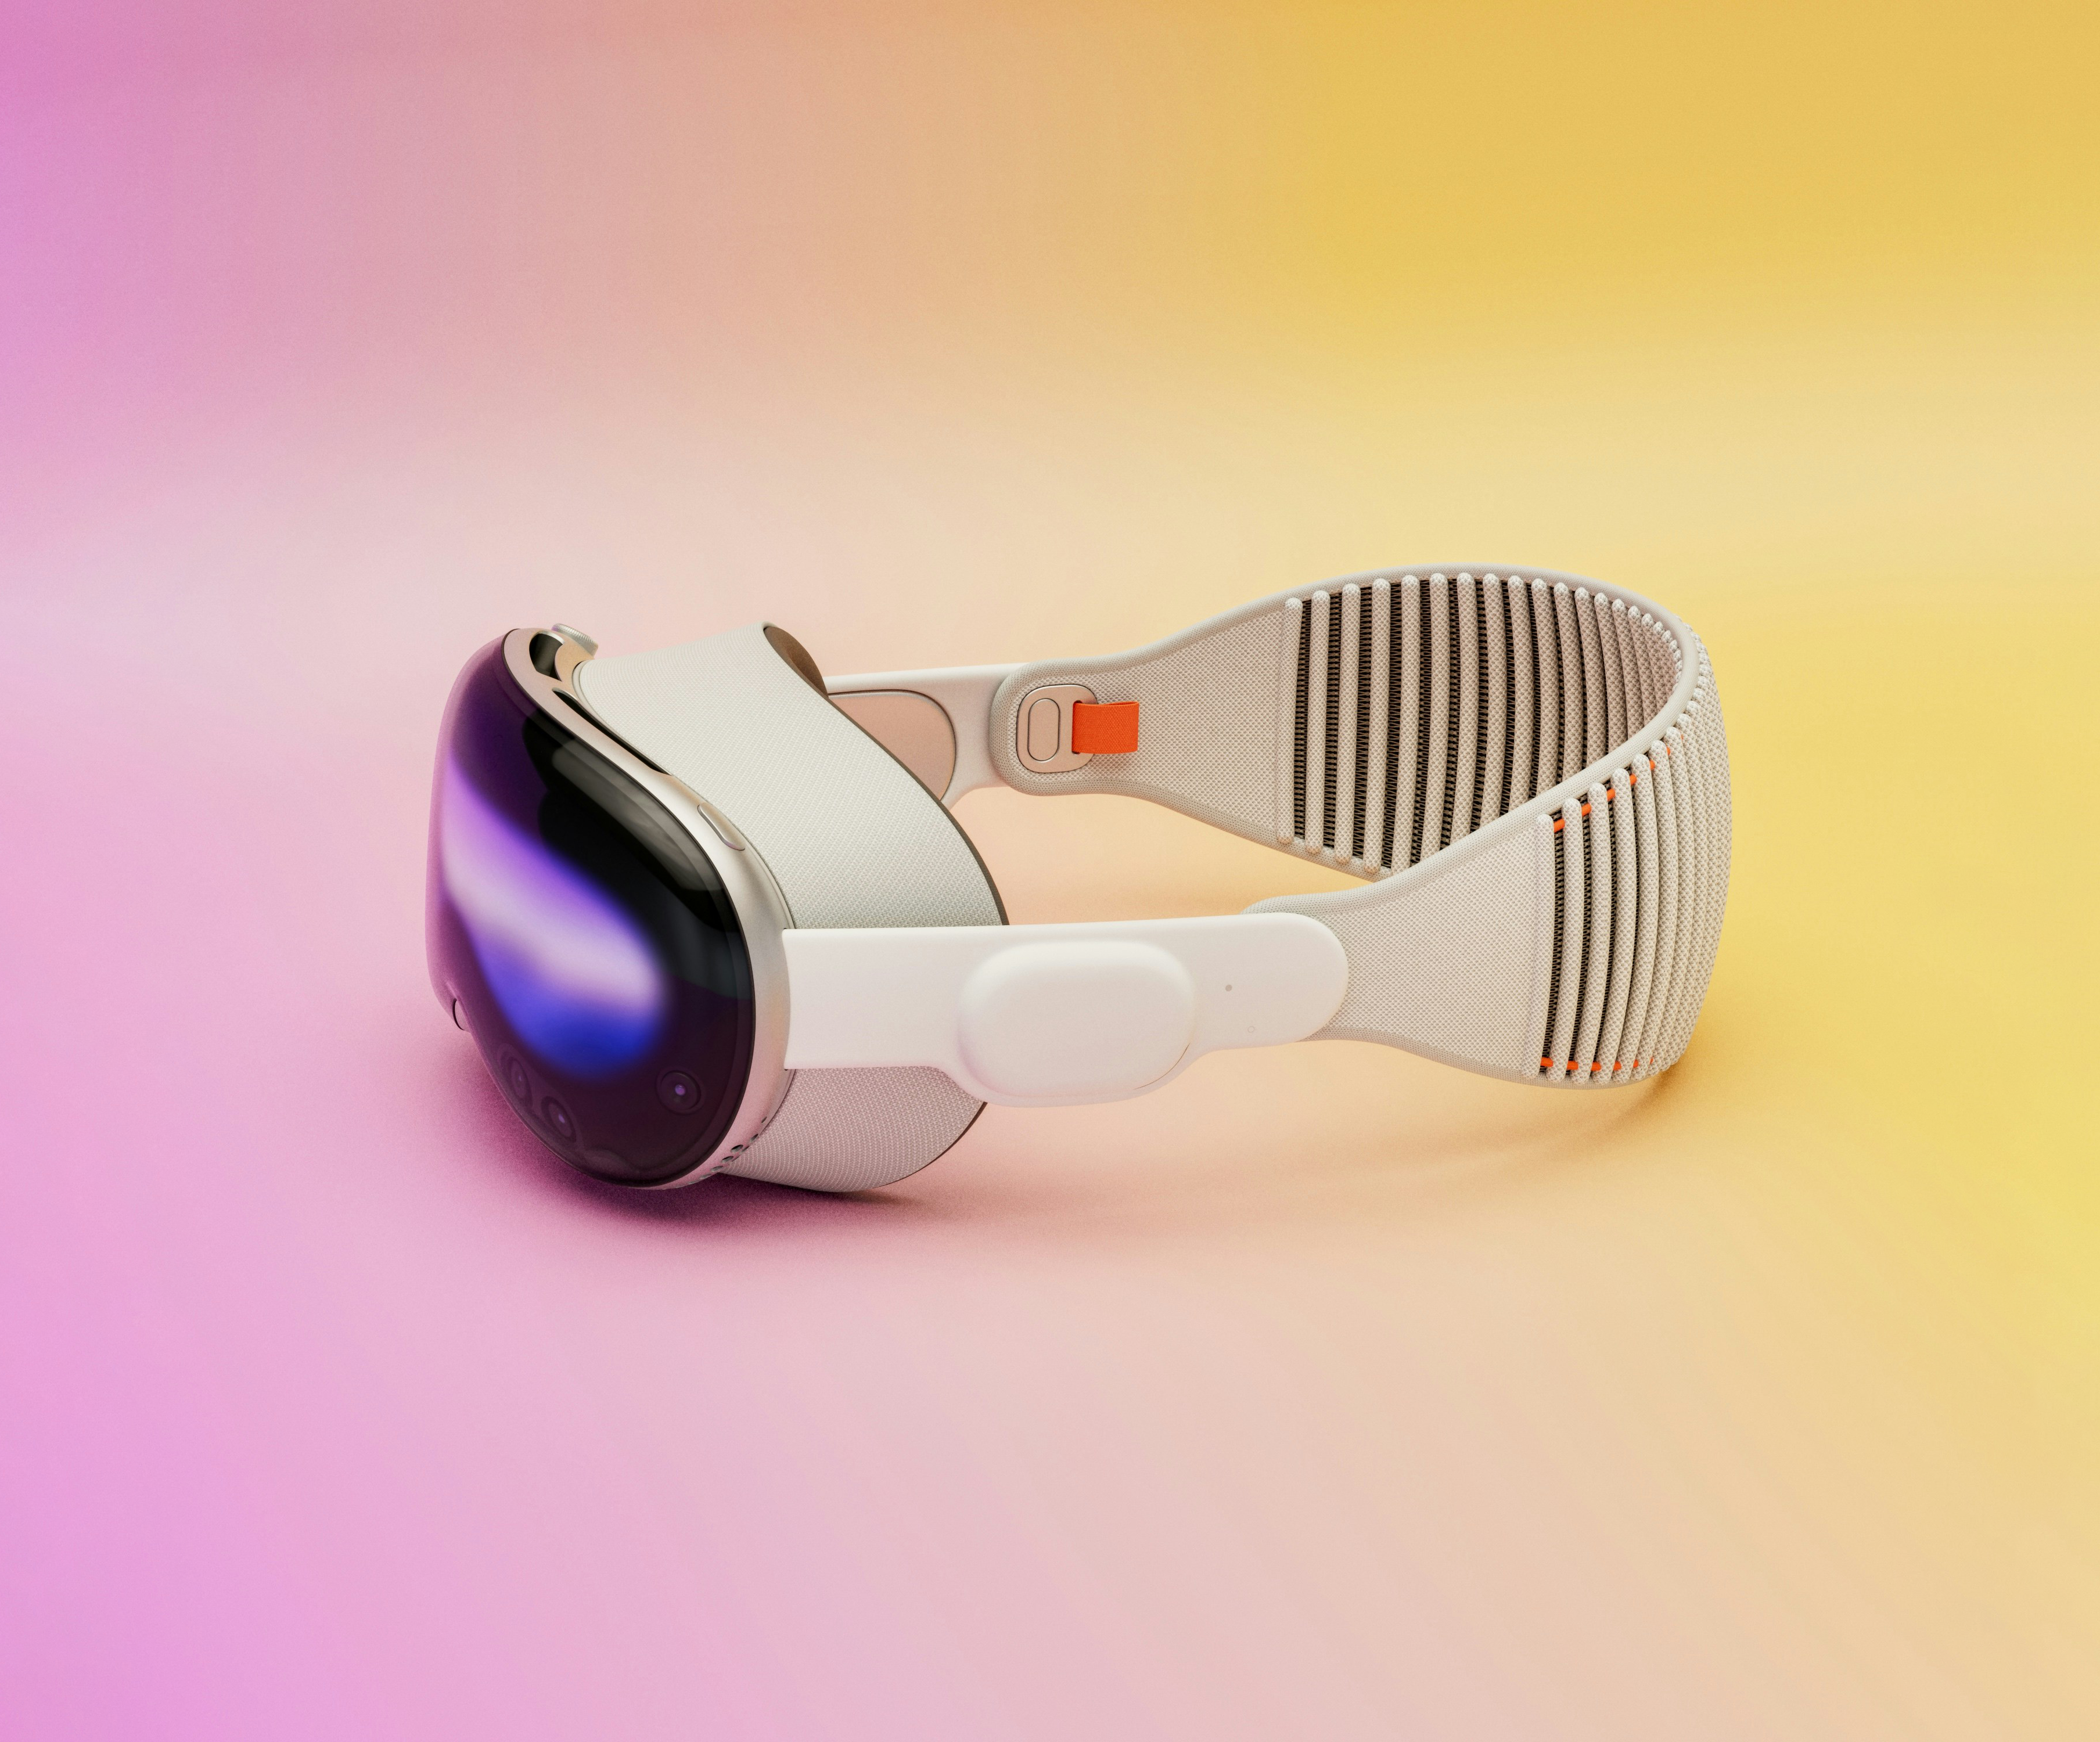
In this tutorial you will learn how to create a simple application for the Apple Vision Pro using XCode, Reality Composer Pro and RapidCompact. You will learn how to prepare a 3D model for the Vision Pro in order to conform with the 3D requirements by Apple to ensure compatibility and performance. Furthermore we will show how to preview the 3D model and your app in the Vision Pro Simulator and import the 3D model using Reality Composer Pro.
All you need is
A short video tutorial is available on YouTube. The step-by-step instructions can be found in this blog post.
In many cases 3D models from online sources are not available in the required 3D formats. In addition, they are too complex in their geometry, materials and textures. The models can be very large, often hundreds of MegaBytes, with millions of polygons and materials. Those are not compatible with the Vision Pro. Making these models compatible with the Vision Pro requirements may be a tedious and time consuming task which needs extensive knowledge of 3D applications like Blender, Autodesk 3ds Max, Cinema 4D or similar.
With RapidCompact you can simplify the conversion and optimization process. You and even preview 3D models in the Vision Pro simulator without even having to compile an application in XCode. This way you can be sure that the 3D model will work and look fine on your Vision Pro. And you can avoid recompiling every time you make changes to your 3D model, just to check if it looks good.
First let’s prepare the development environment so we can import, compile and test our app in the Vision Pro simulator. To download and use XCode, Apples development environment, you need to be enrolled as Apple developer. If you’re not yet a developer, here is how you can enroll ($99 per year): https://developer.apple.com/programs/enroll/
If you’re enrolled already, just download the latest XCode version 15.x and install the Vision OS 1.0 beta platform when prompted within the installation process.
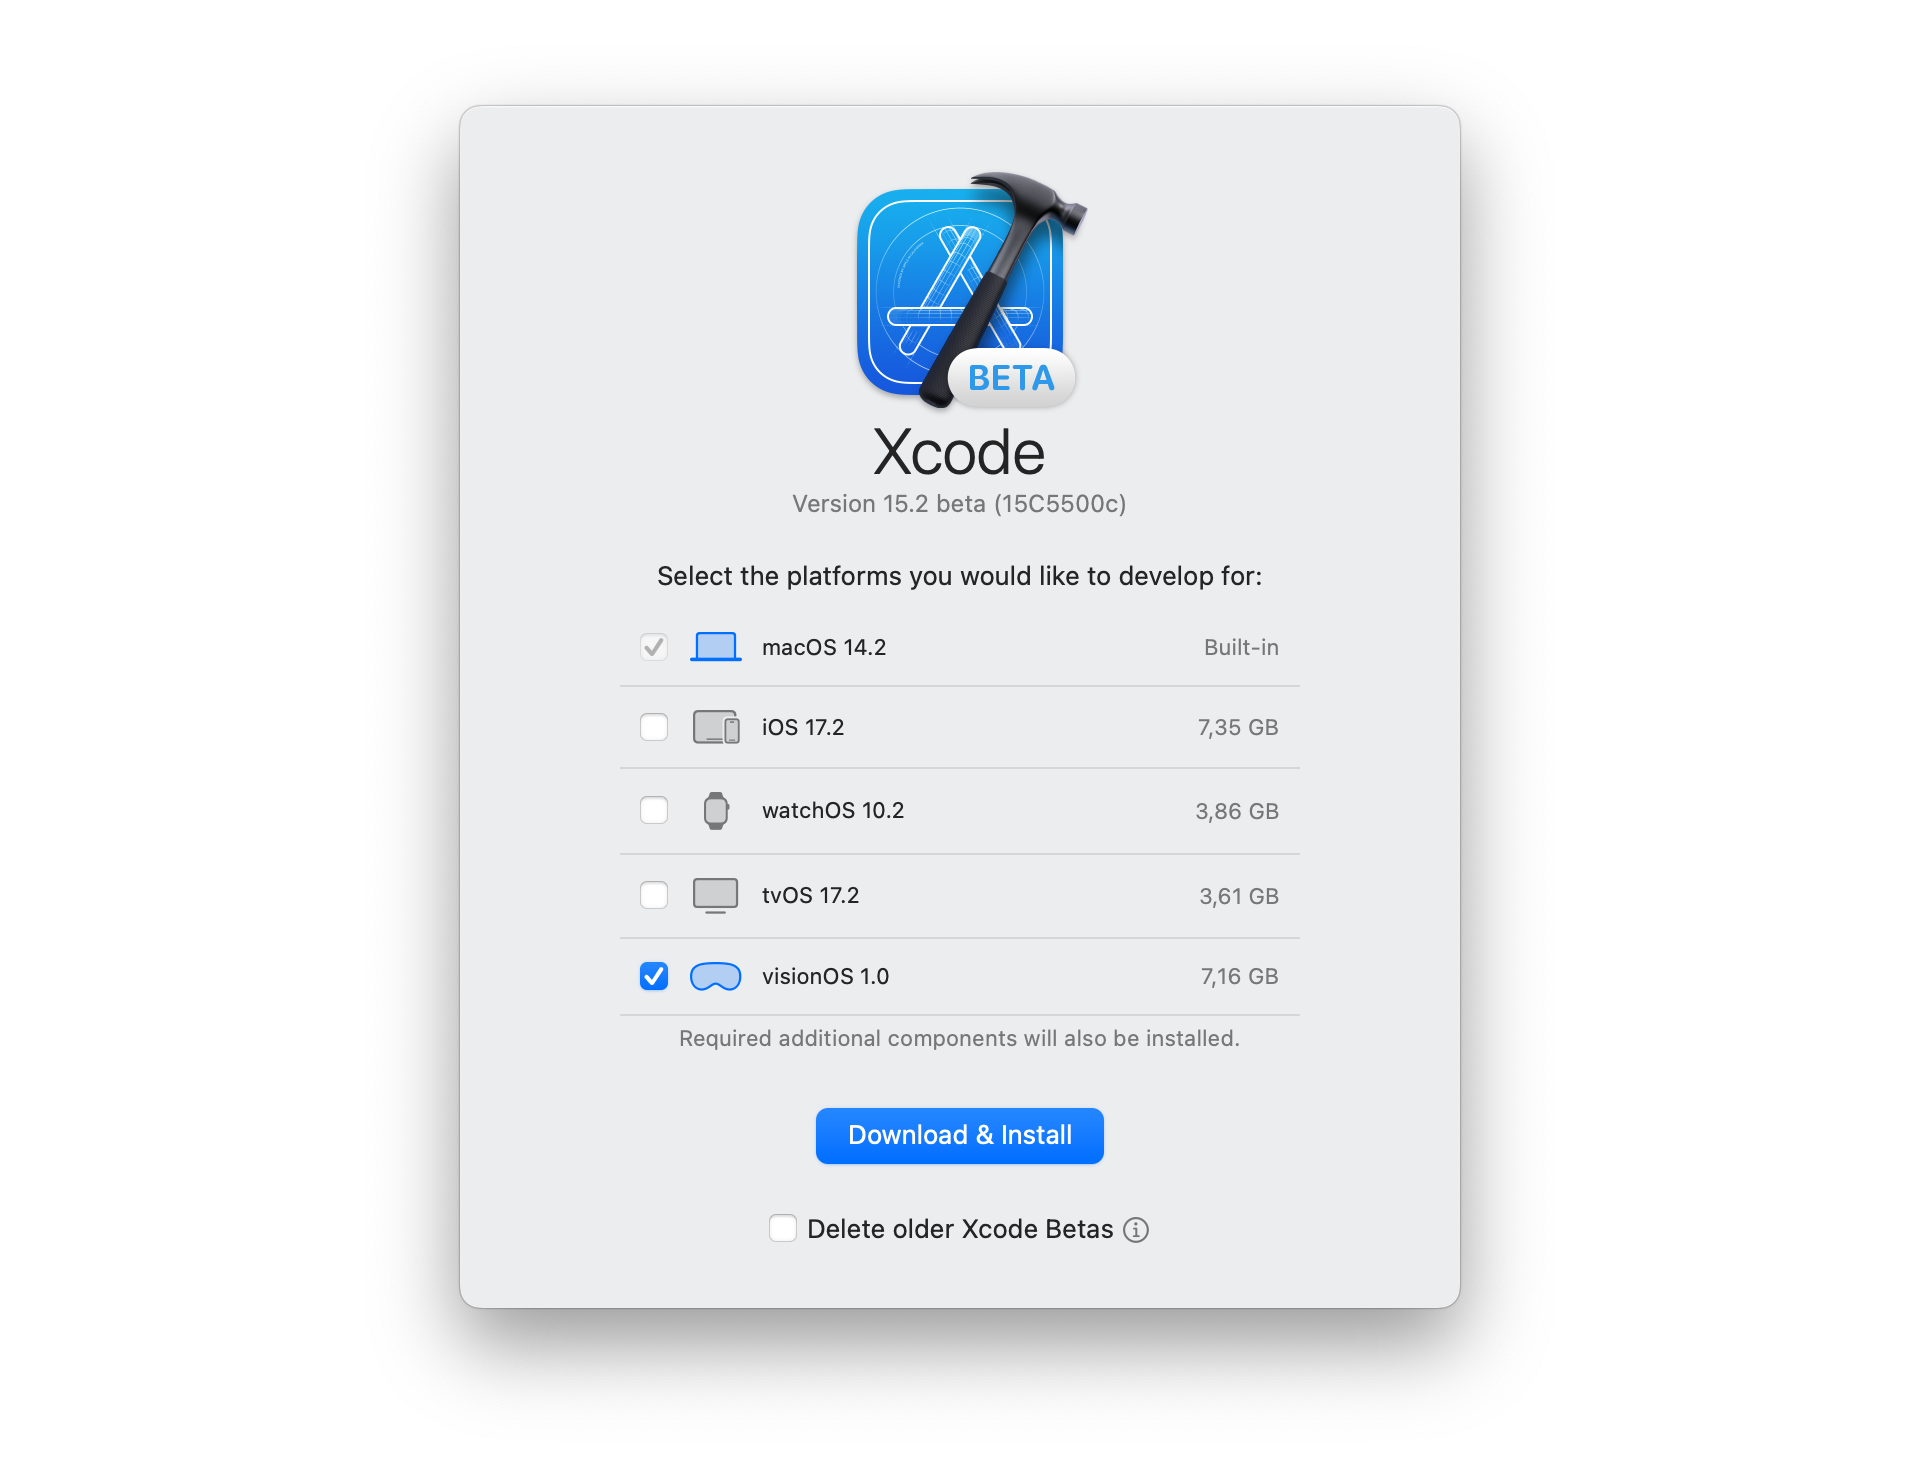
Once Xcode is running and the Vision Pro extension has been downloaded (7 GB) and installed, you can create a new project and test the simulator.
Select “Create new project” from the File menu in XCode and choose VisionOS to create a Vision Pro project. Then choose a name for your application (product) and an organization name. Select “VOLUME” for the initial scene, “Reality Kit” as immersive space renderer and “Full” for the immersive space. Click Next to select a location where XCode stores your files and source code and wait for XCode to start your project and pre-compile the code.
You should now see a screen like this:
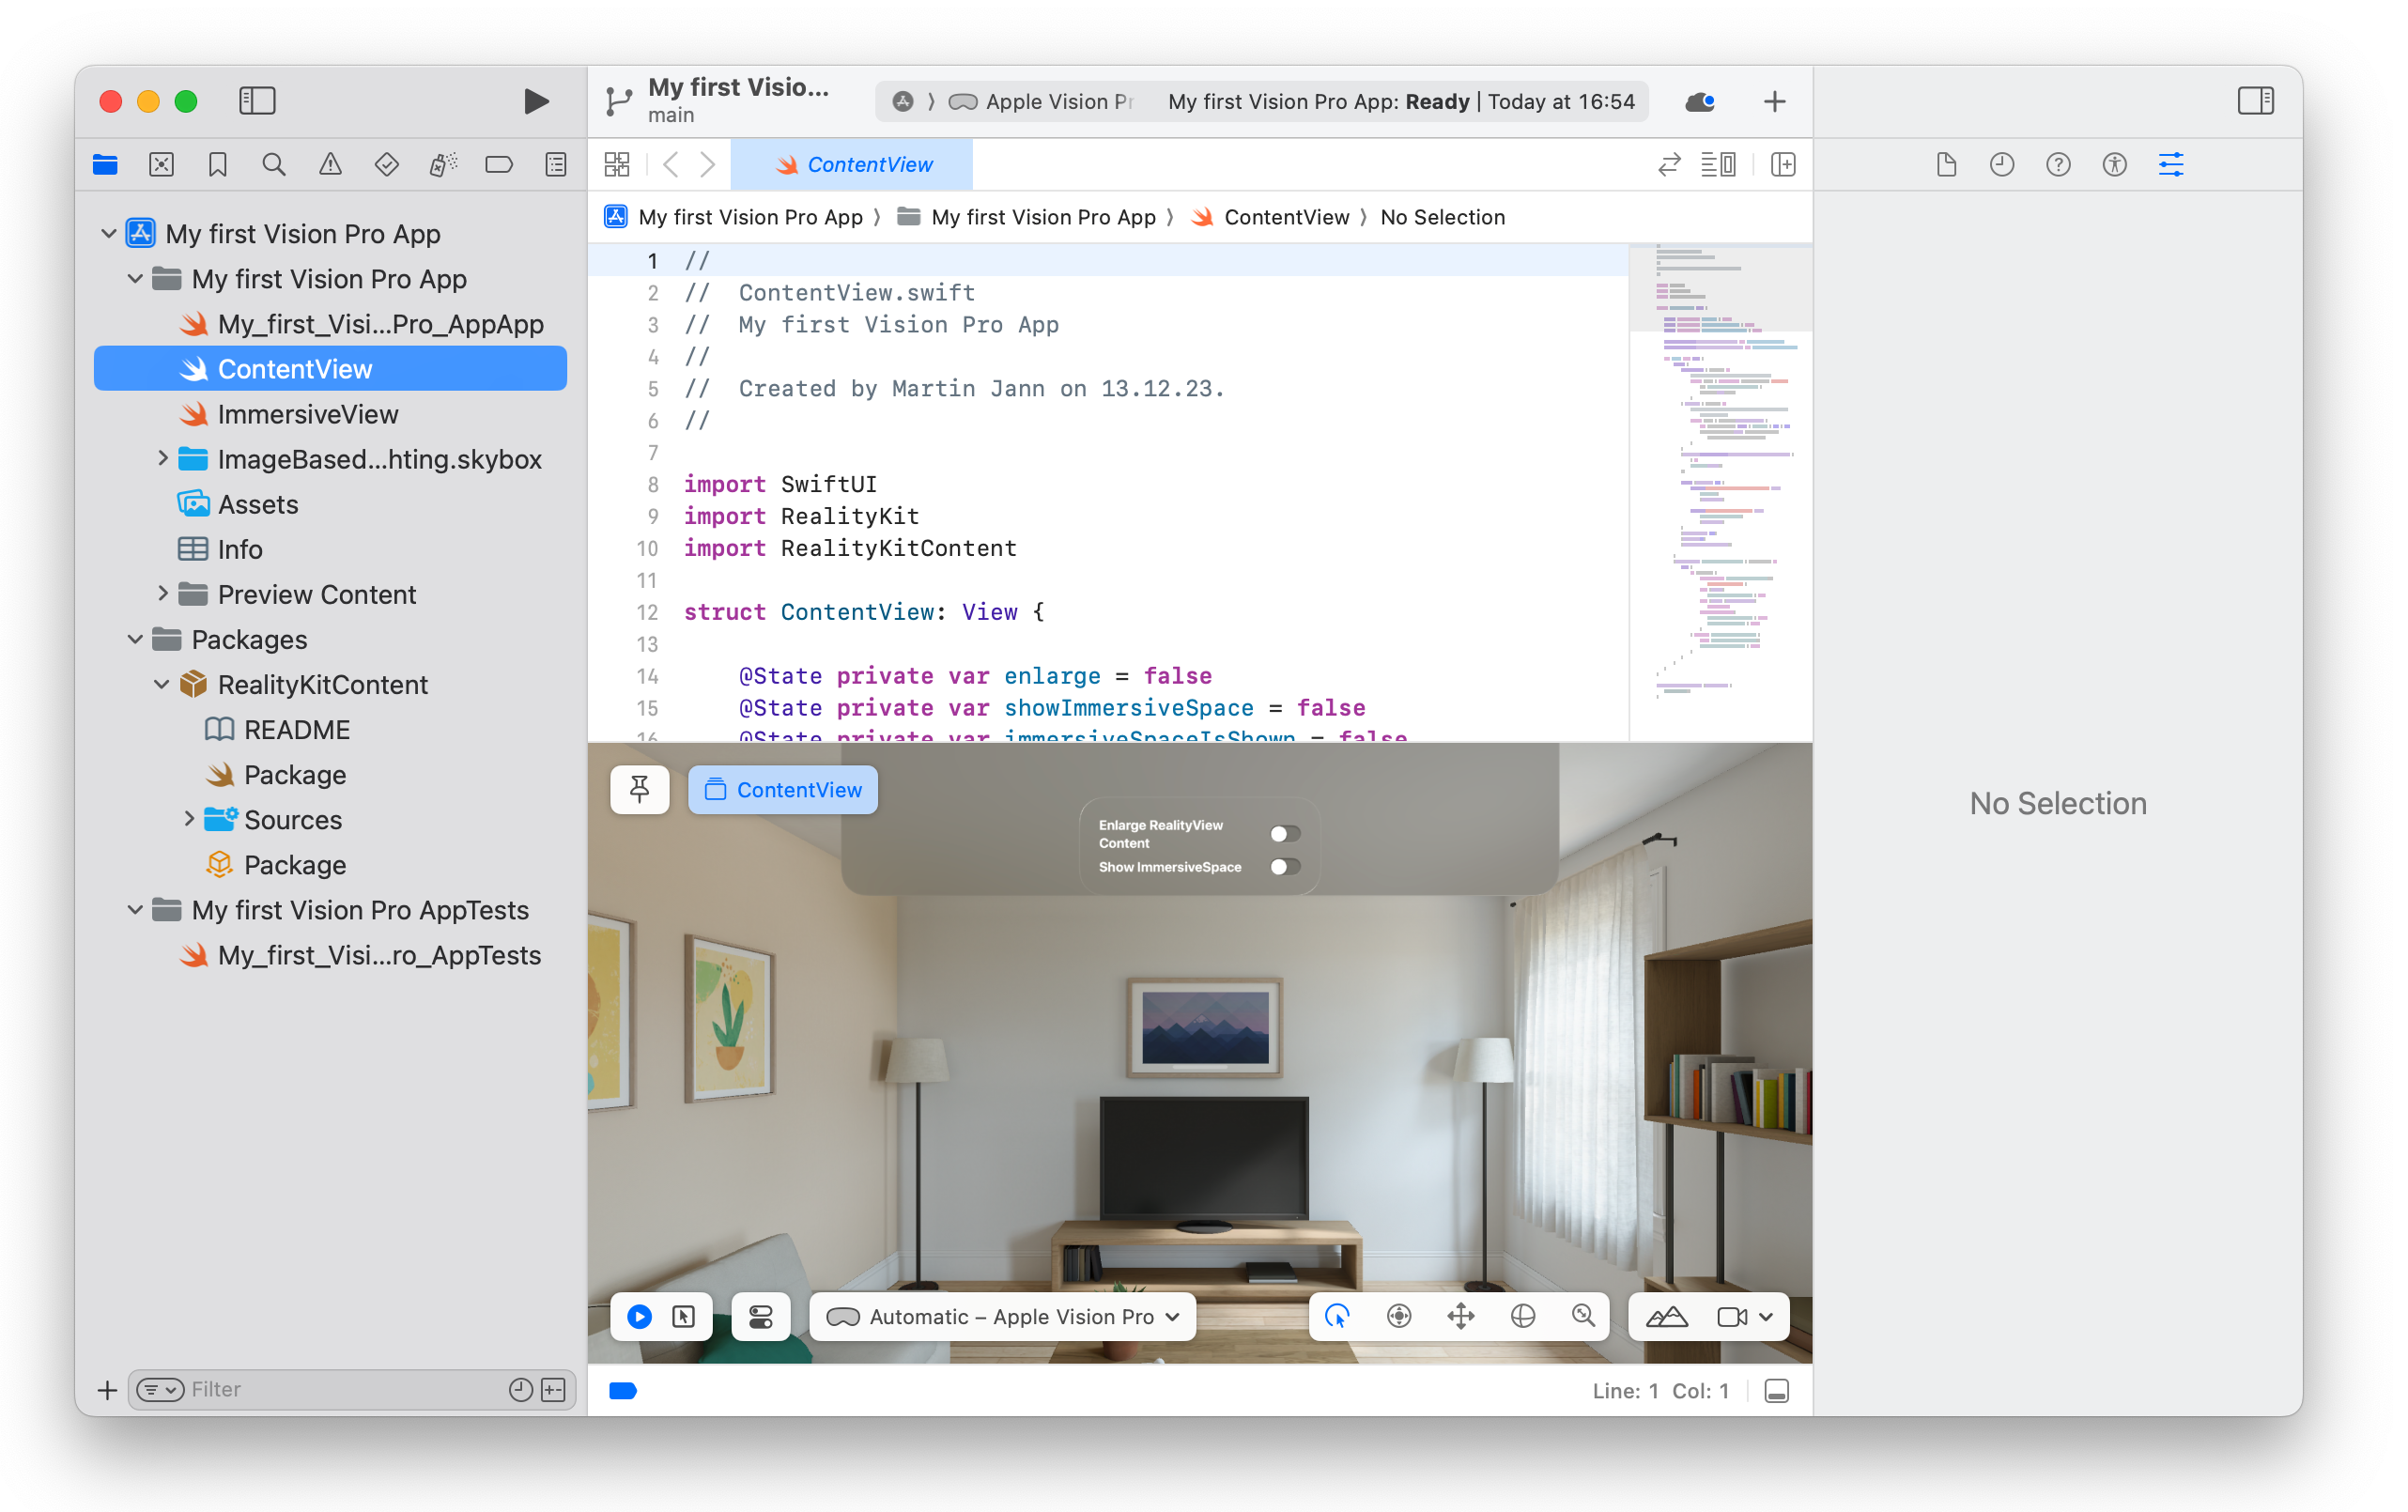
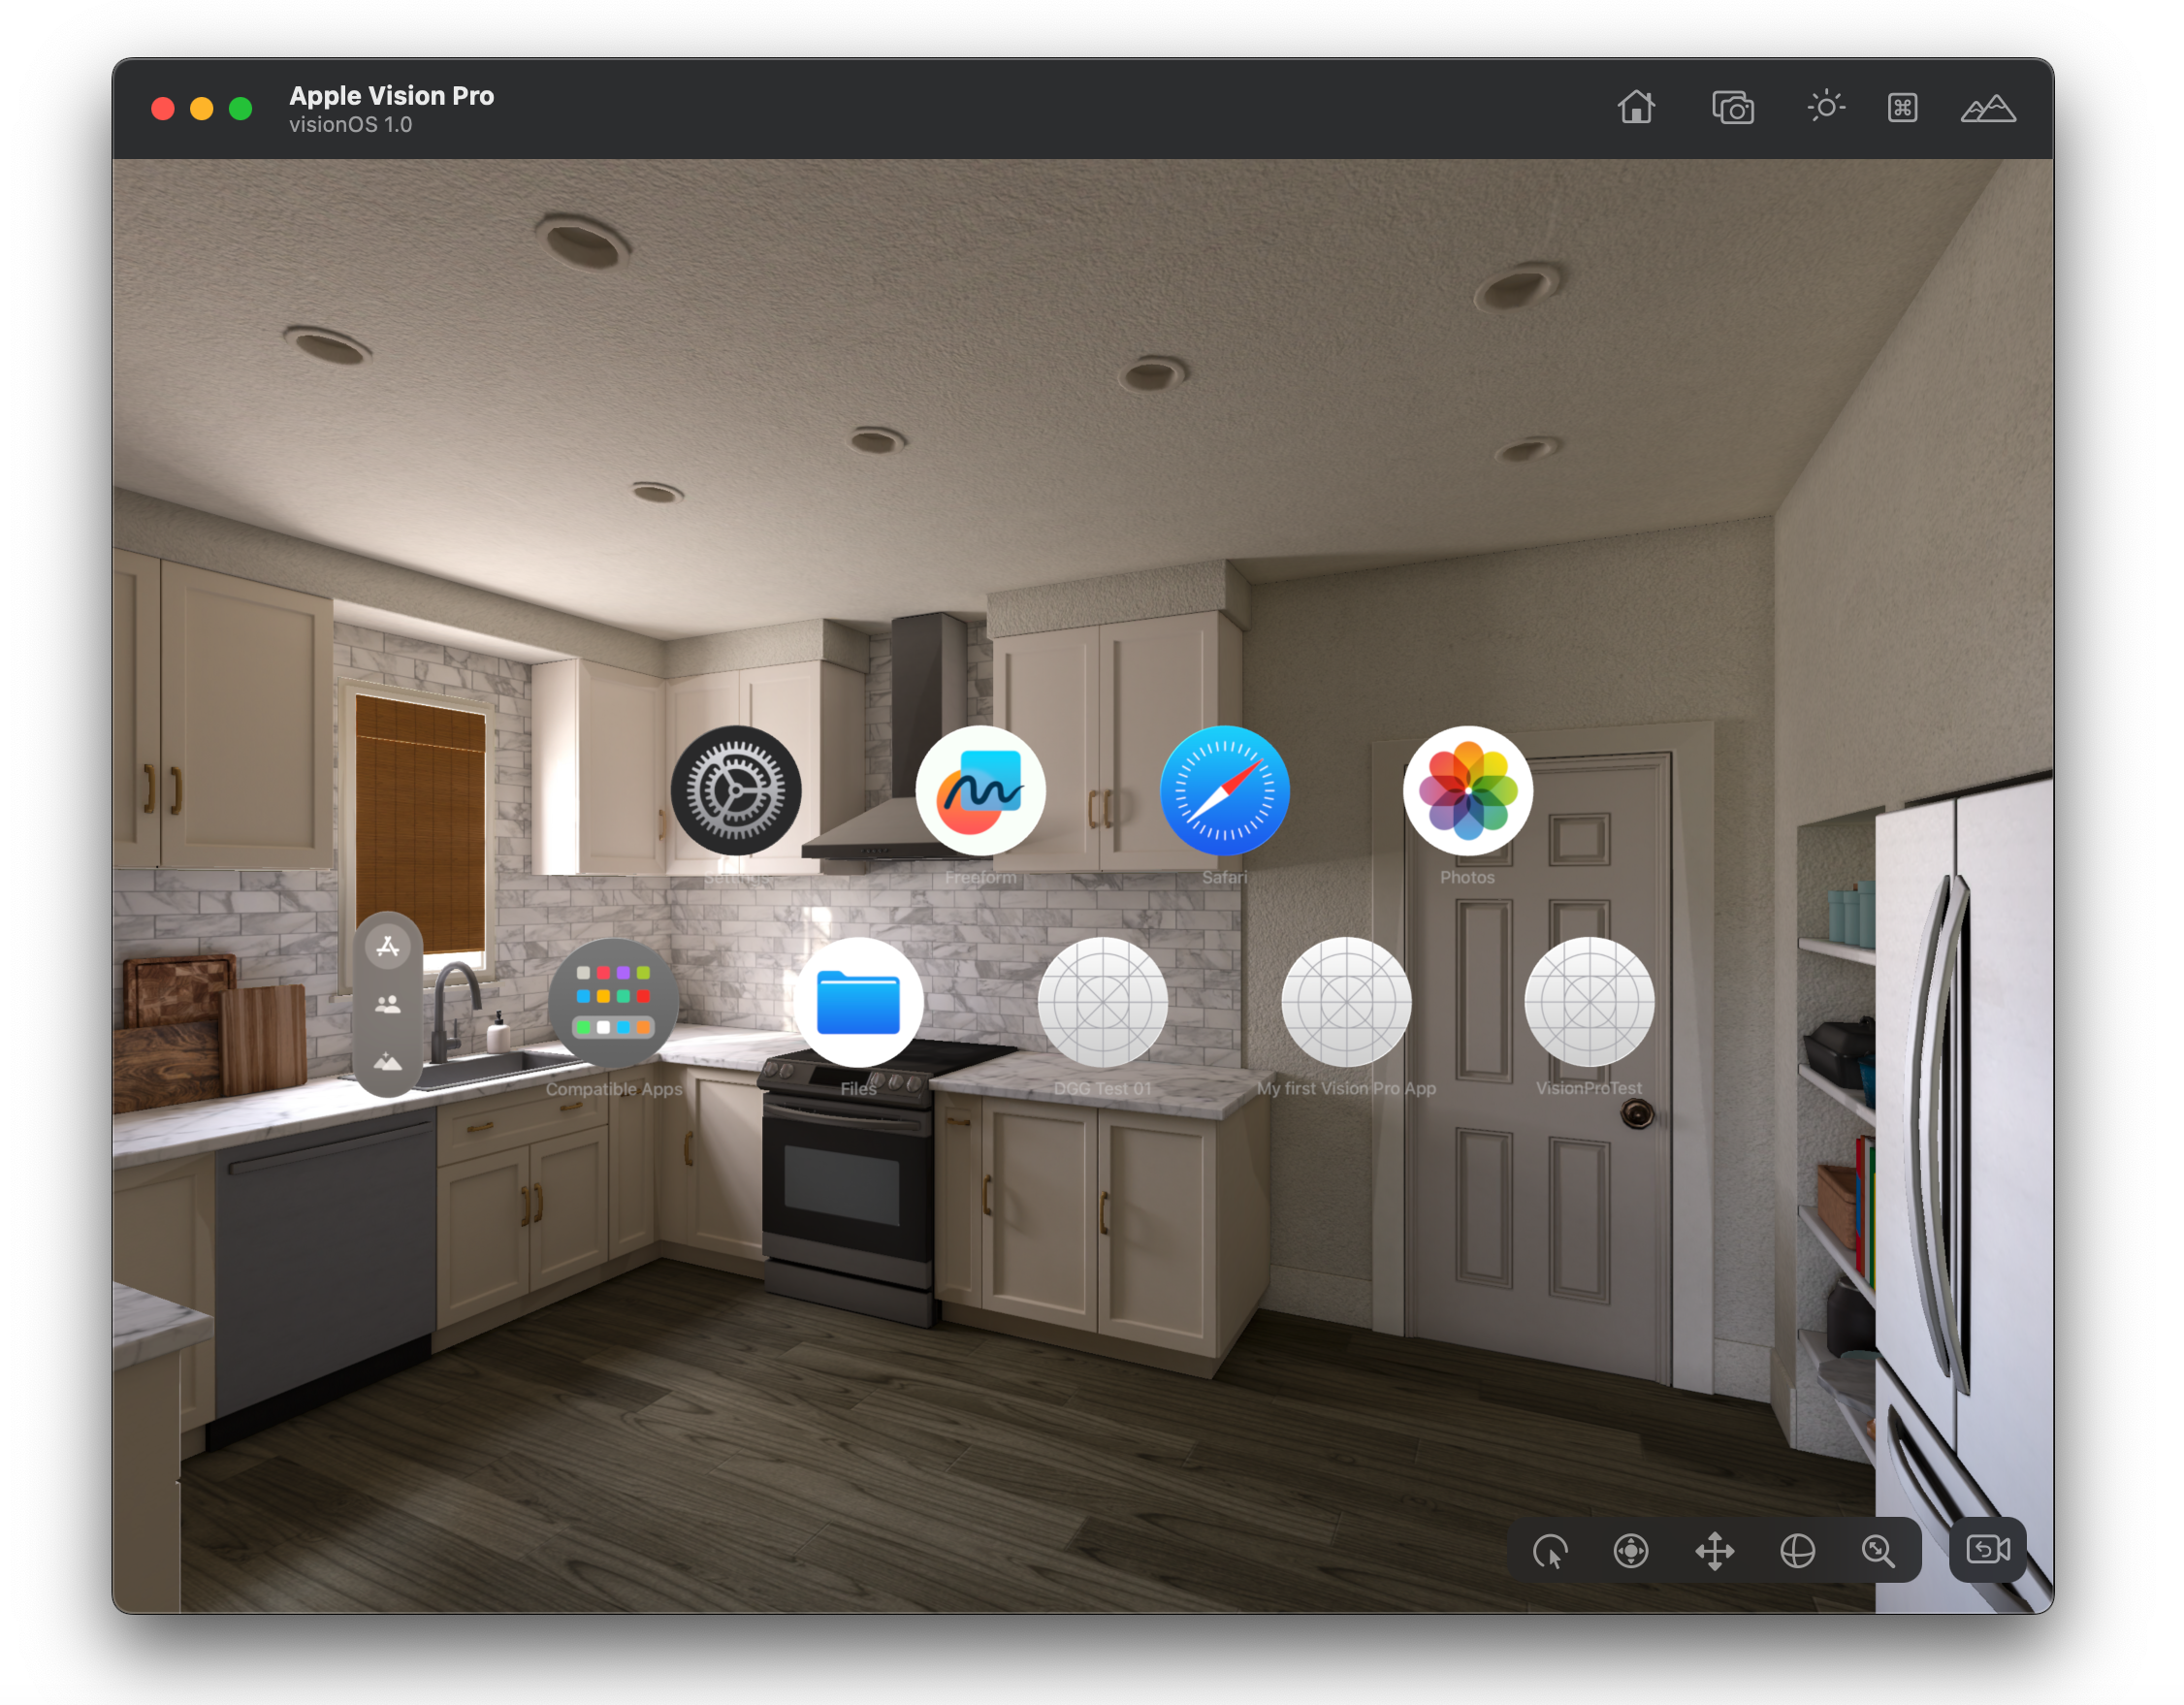
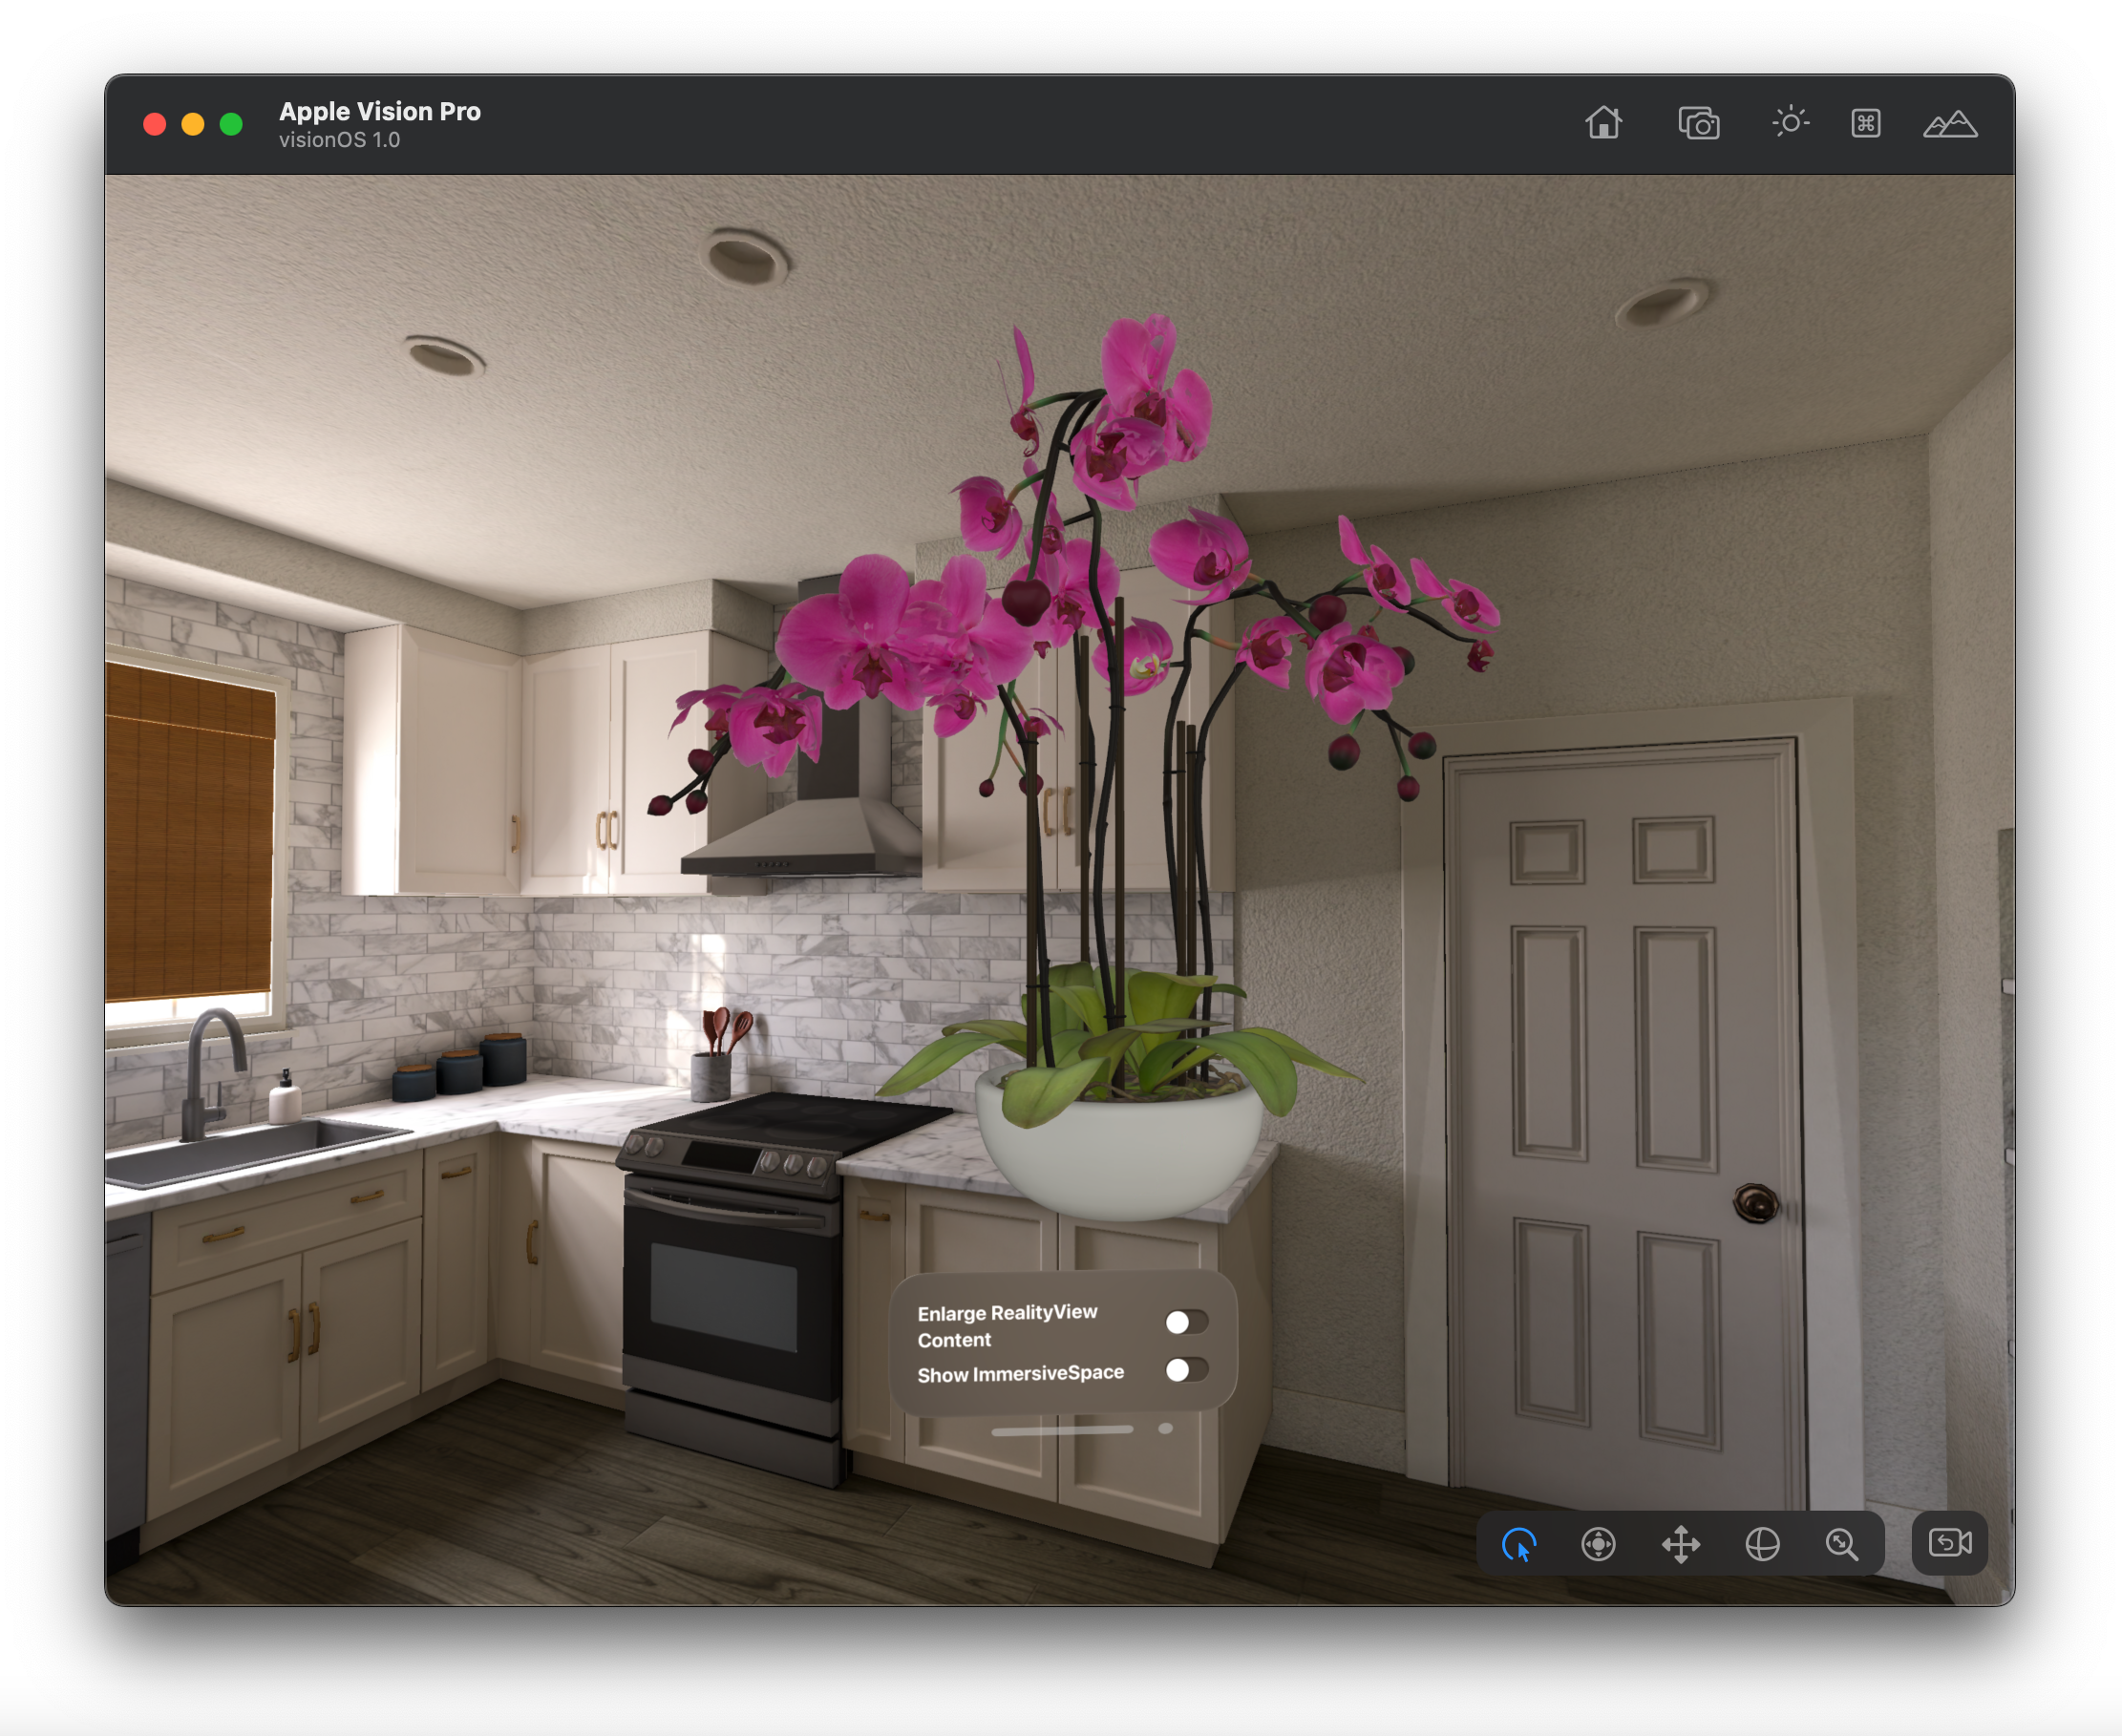
If you want to test the simulator to make yourself familiar with the navigation, click the “>” button on the header in XCode. This will start the simulator in a separate window and show a living room that simulates a real environment which represents a physical space (the room in which the users normally uses the Vision Pro). You can now navigate in this window using the keys W A S D to move forward, left, right and backward (to simulate body movement). Use your mouse right click to rotate the view and your mouse left click to move up down left and right. (here is the Apple developer documentation on navigating the Vision OS simulator).
Now that we know the basics, let’s prepare a 3D model which we want to use for the project.

If you don’t have a 3D model at hand, there are plenty of sources on the web where you can find free 3D models. CGTrader, Turbosquid, Sketchfab and Blendermarket are some of the most popular 3D marketplaces, but there are many more. If you are looking for design furniture models, then DesignConnected is a very good source that also has some free models available for download.
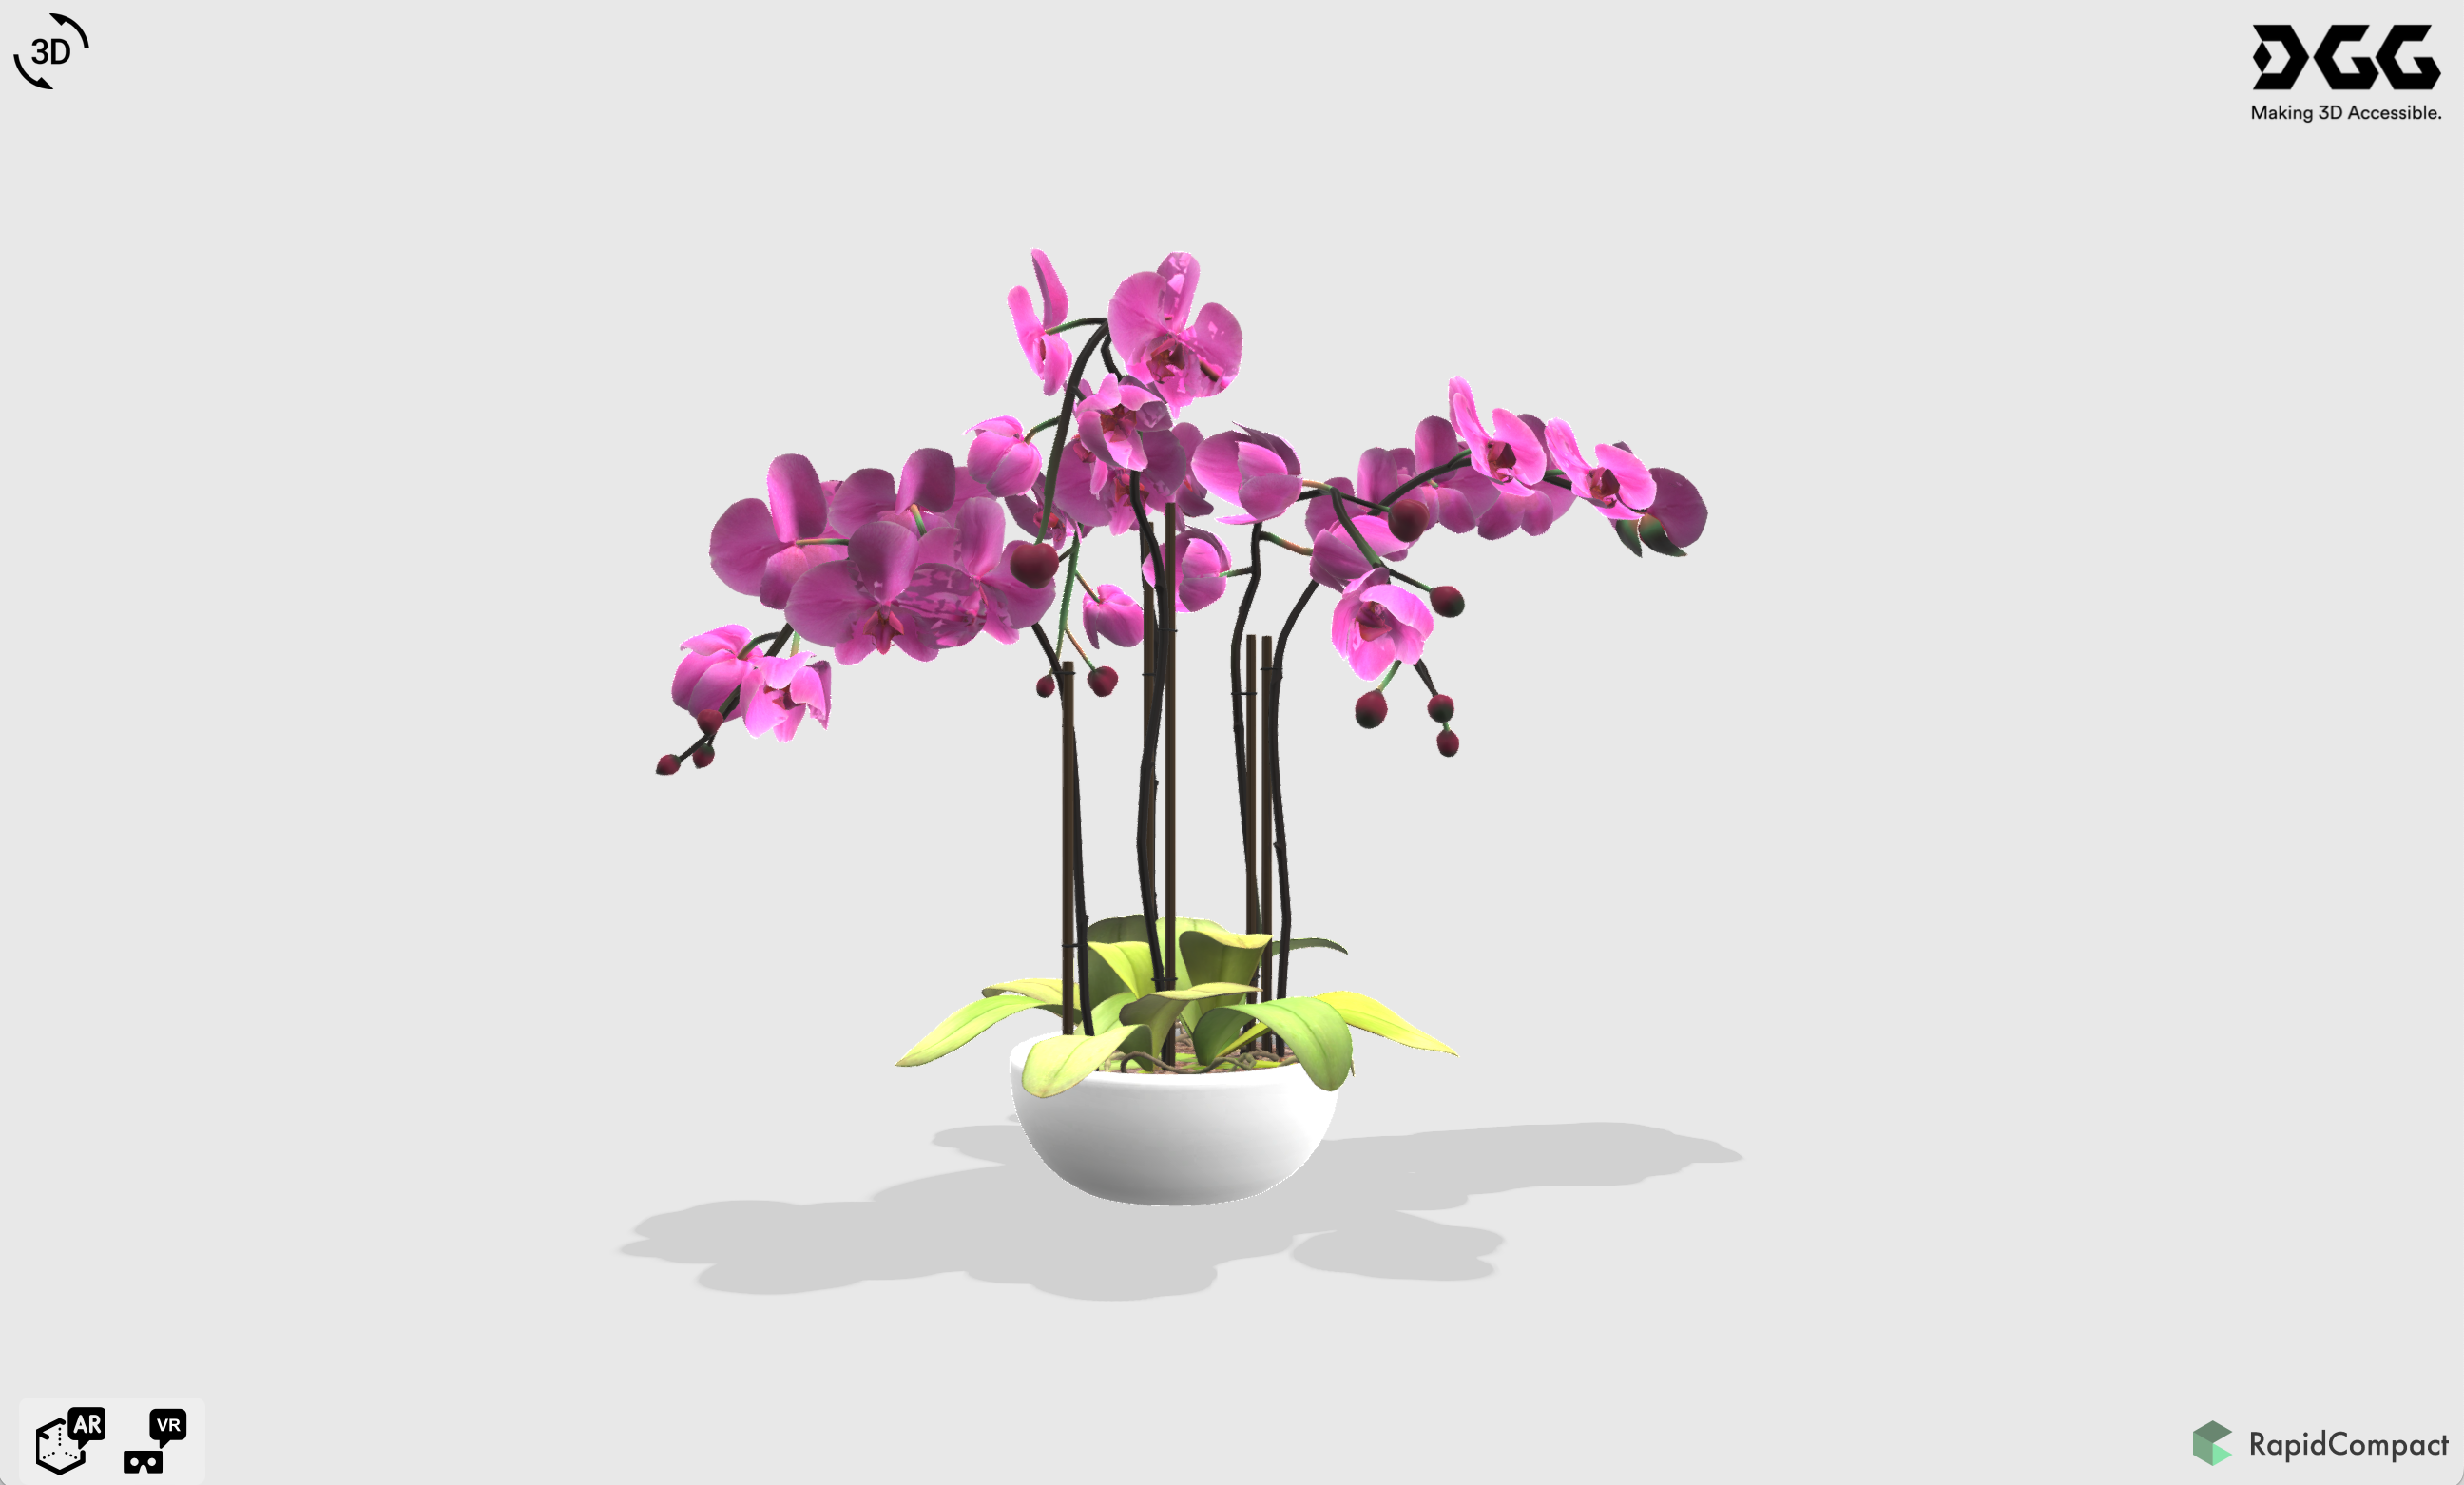
For this example we are using the free Orchid table plant which is available in various 3D formats. We will choose the FBX / OBJ format so we can import this into RapidCompact and prepare the model for realtime viewing on the Vision Pro. The original FBX file comes with a large number of individual textures and materials. This results in slower performance on any device, because more drawcalls have to be processed on the GPU. The original size of the 3D model is about 30 MB with almost 300,000 polygons. File size, polygon count and number of textures should be reduced for better performance and fast loading of the model. For this we’re using RapidCompact.
RapidPBR: If you have just a 3ds Max model, our RapidCompact extension ´RapidPBR´ will soon allow full conversion of your scene into any RapidCompact format easily. Stay tuned for the RapidPBR release in 2024.
With your RapidCompact cloud account you should now upload the FBX model on the upload page. RapidCompact analyzes the 3D model and shows a rendered preview of the model. Sometimes textures might be missing or the size might be off. If textures are missing, please use a 3D application to adjust the materials and textures, then re-upload the model. If the size is wrong, you can easily change the size on the right side in the scale section directly within RapidCompact.
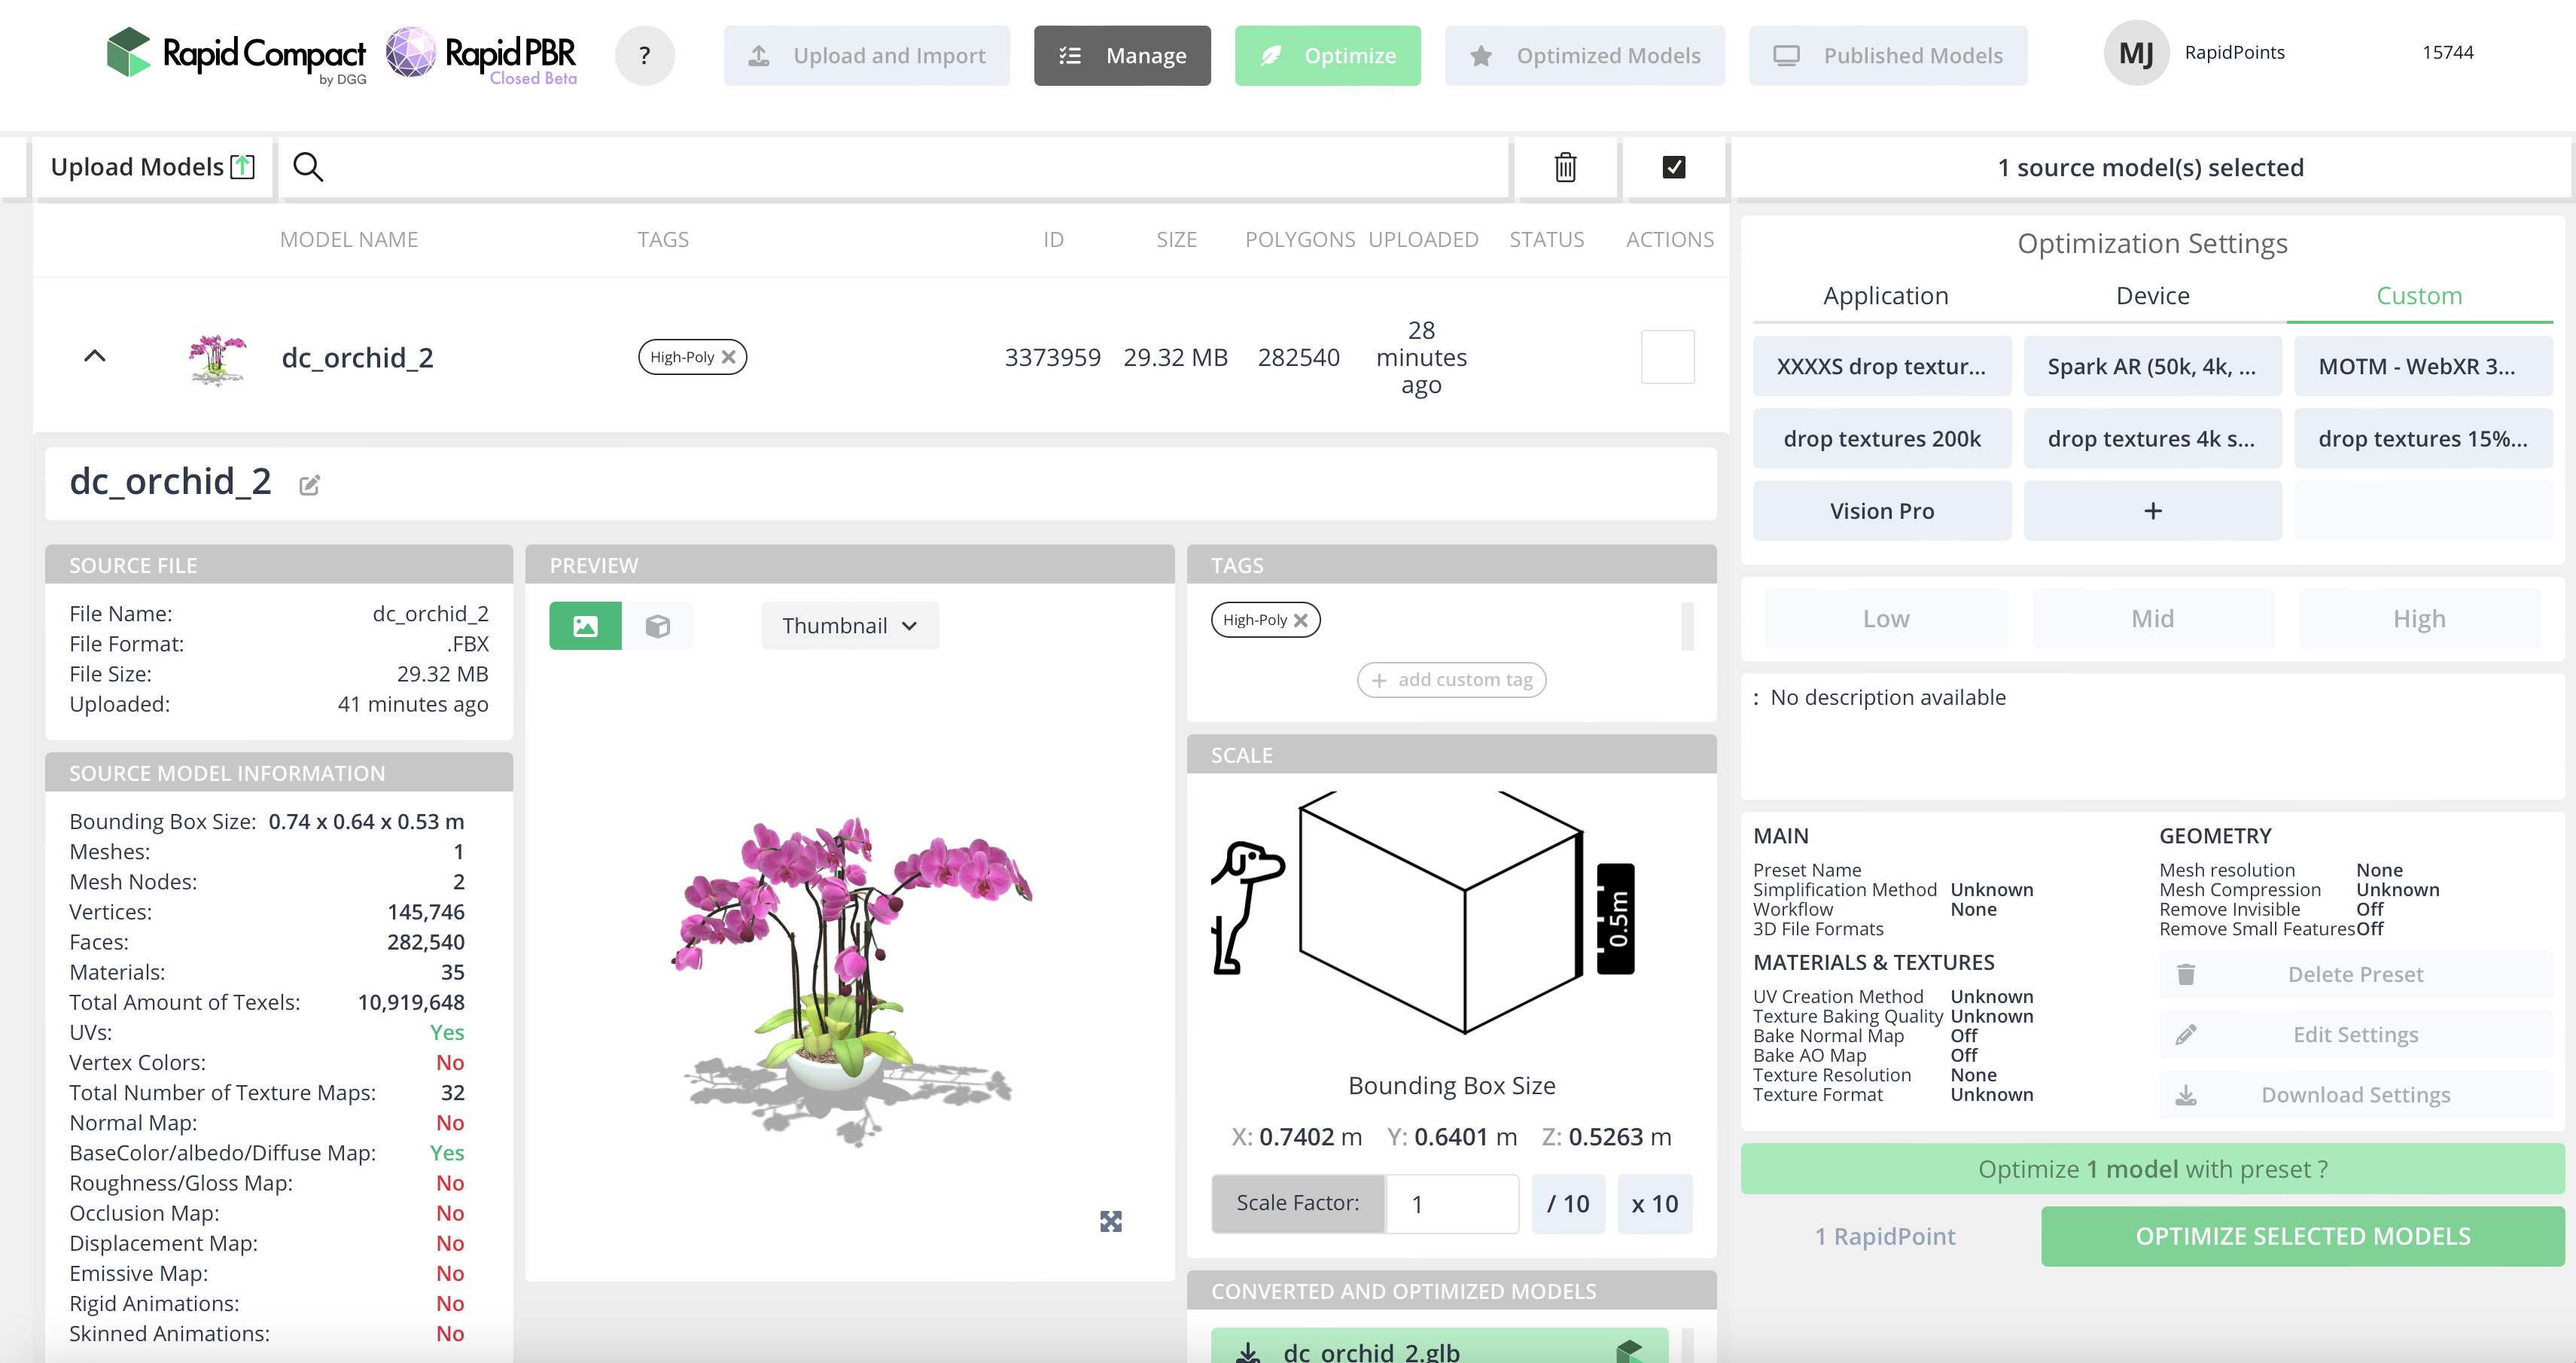
We want to reduce the 3D model to a size ideally smaller than 5 MB so it loads fast from the web, bake textures to reduce drawcalls, reduce the number of polygons to improve display performance and convert the model into the USDZ format so that it’s compatible with the Vision Pro.
We’ve added a new preset which helps you to get your model ready in just one click.
Choose the default preset “Apple Vision Pro” from the “Optimization Settings” section and start the optimization and conversion process with the green “OPTIMIZE SELECTED MODELS” button on the right bottom corner. If this button is not activated, you need to select (check mark) your model first in the “Actions” column.
After processing has finished, the model will be available in the “OPTIMIZED MODELS” section. Here you can review the model in a realtime 3D viewer in your browser. You can also create an embed, so a 3D viewer which you can use on your website. If you want to check your 3D model with an iPhone or iPad in Augmented Reality before testing in XCode, you can easily do so with the AR QRCode option on the bottom left.
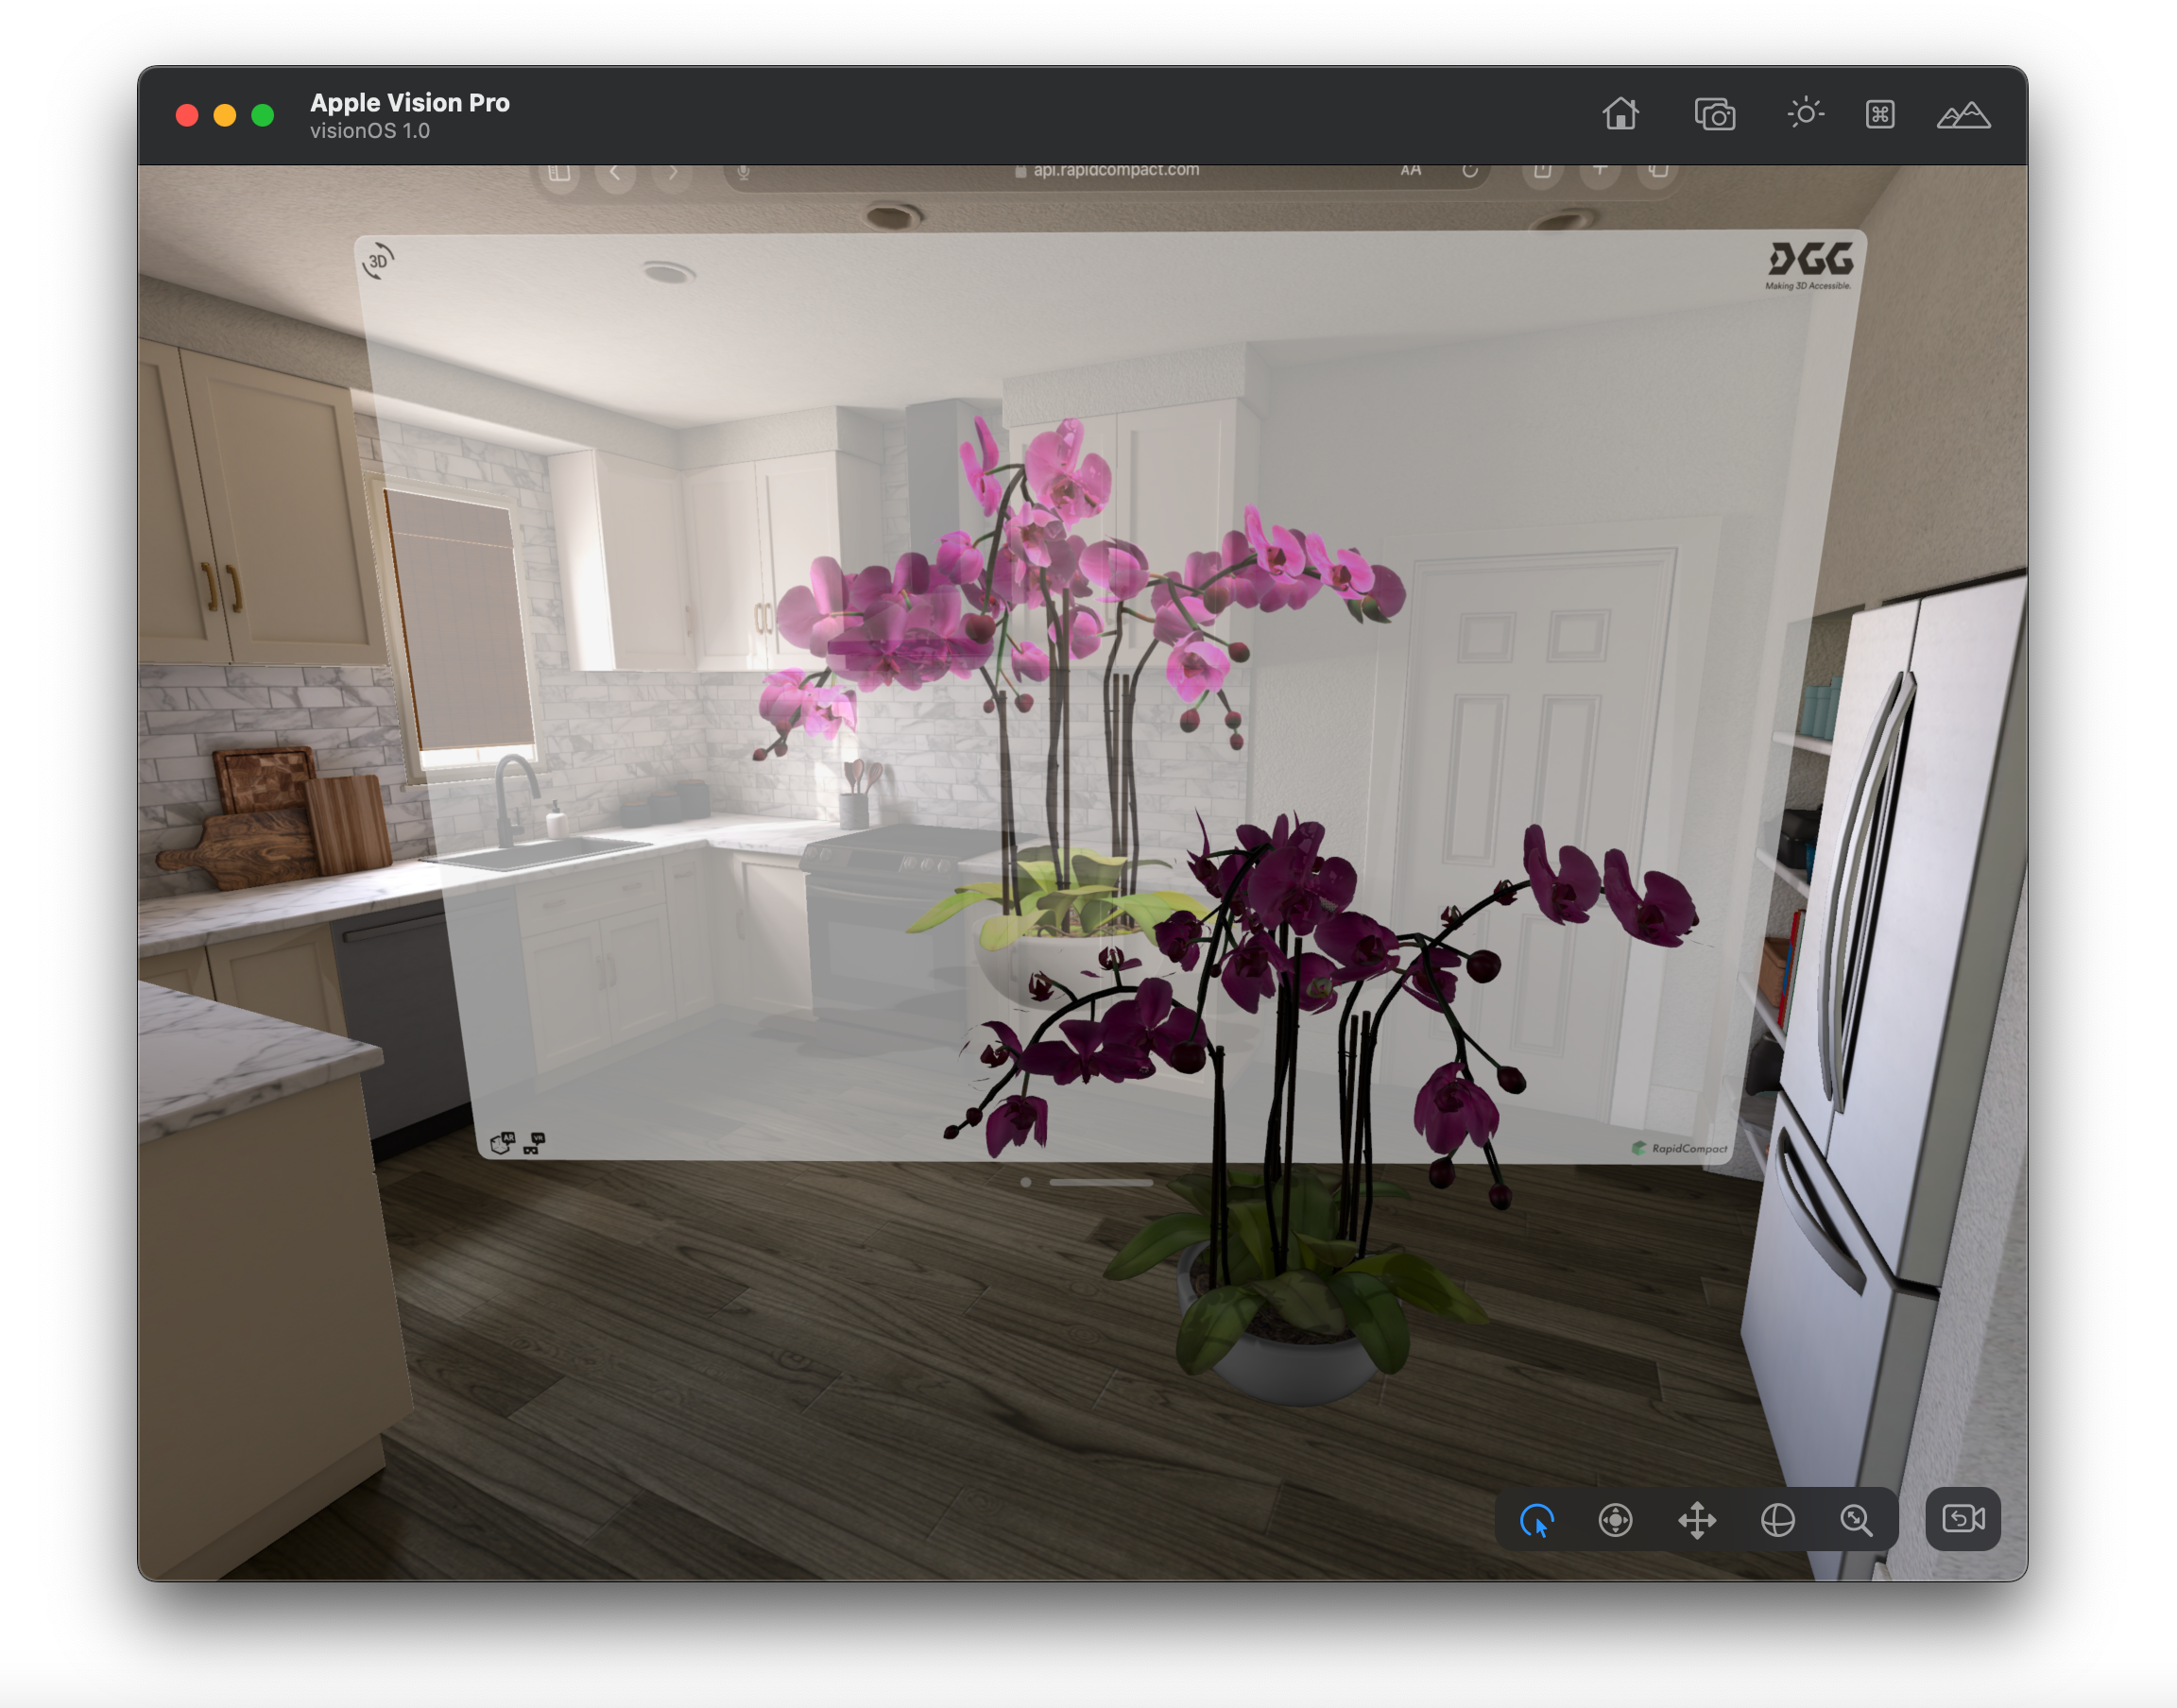
Now we’re ready to test the 3D model in the Vision Pro Simulator. If you have made yourself familiar with navigation in the simulator (see above) you can now see the 3D model directly with the Safari app inside the simulator.
To open Safari, click on the HOME icon on the top header bar of the simulator. Then click on the Safari icon to open the browser. In the browser, type “www.rapidcompact.com” in the URL and open the RapidCompact website. Afterwards LOGIN to the RapidCompact application using your username and password. Next select “PUBLISHED MODELS” on the top header to view your previously created embed with your 3D model. Click on the VIEW button on the right to see a preview in the browser.
You can now rotate your model in the simulator. But that is still a flat 2D representation even on the Vision Pro. Much cooler is the fact that you can preview your 3D model in your space with the AR option from RapidCompact. Just click on the small AR icon on the left bottom corner to open the 3D model in your space within the simulator. This way you can move the model around and rotate to see if it fits well.
While a preview is quite nice already, we want to import the 3D model into our application. For this we’re using Reality Composer Pro, which is built into XCode 15.
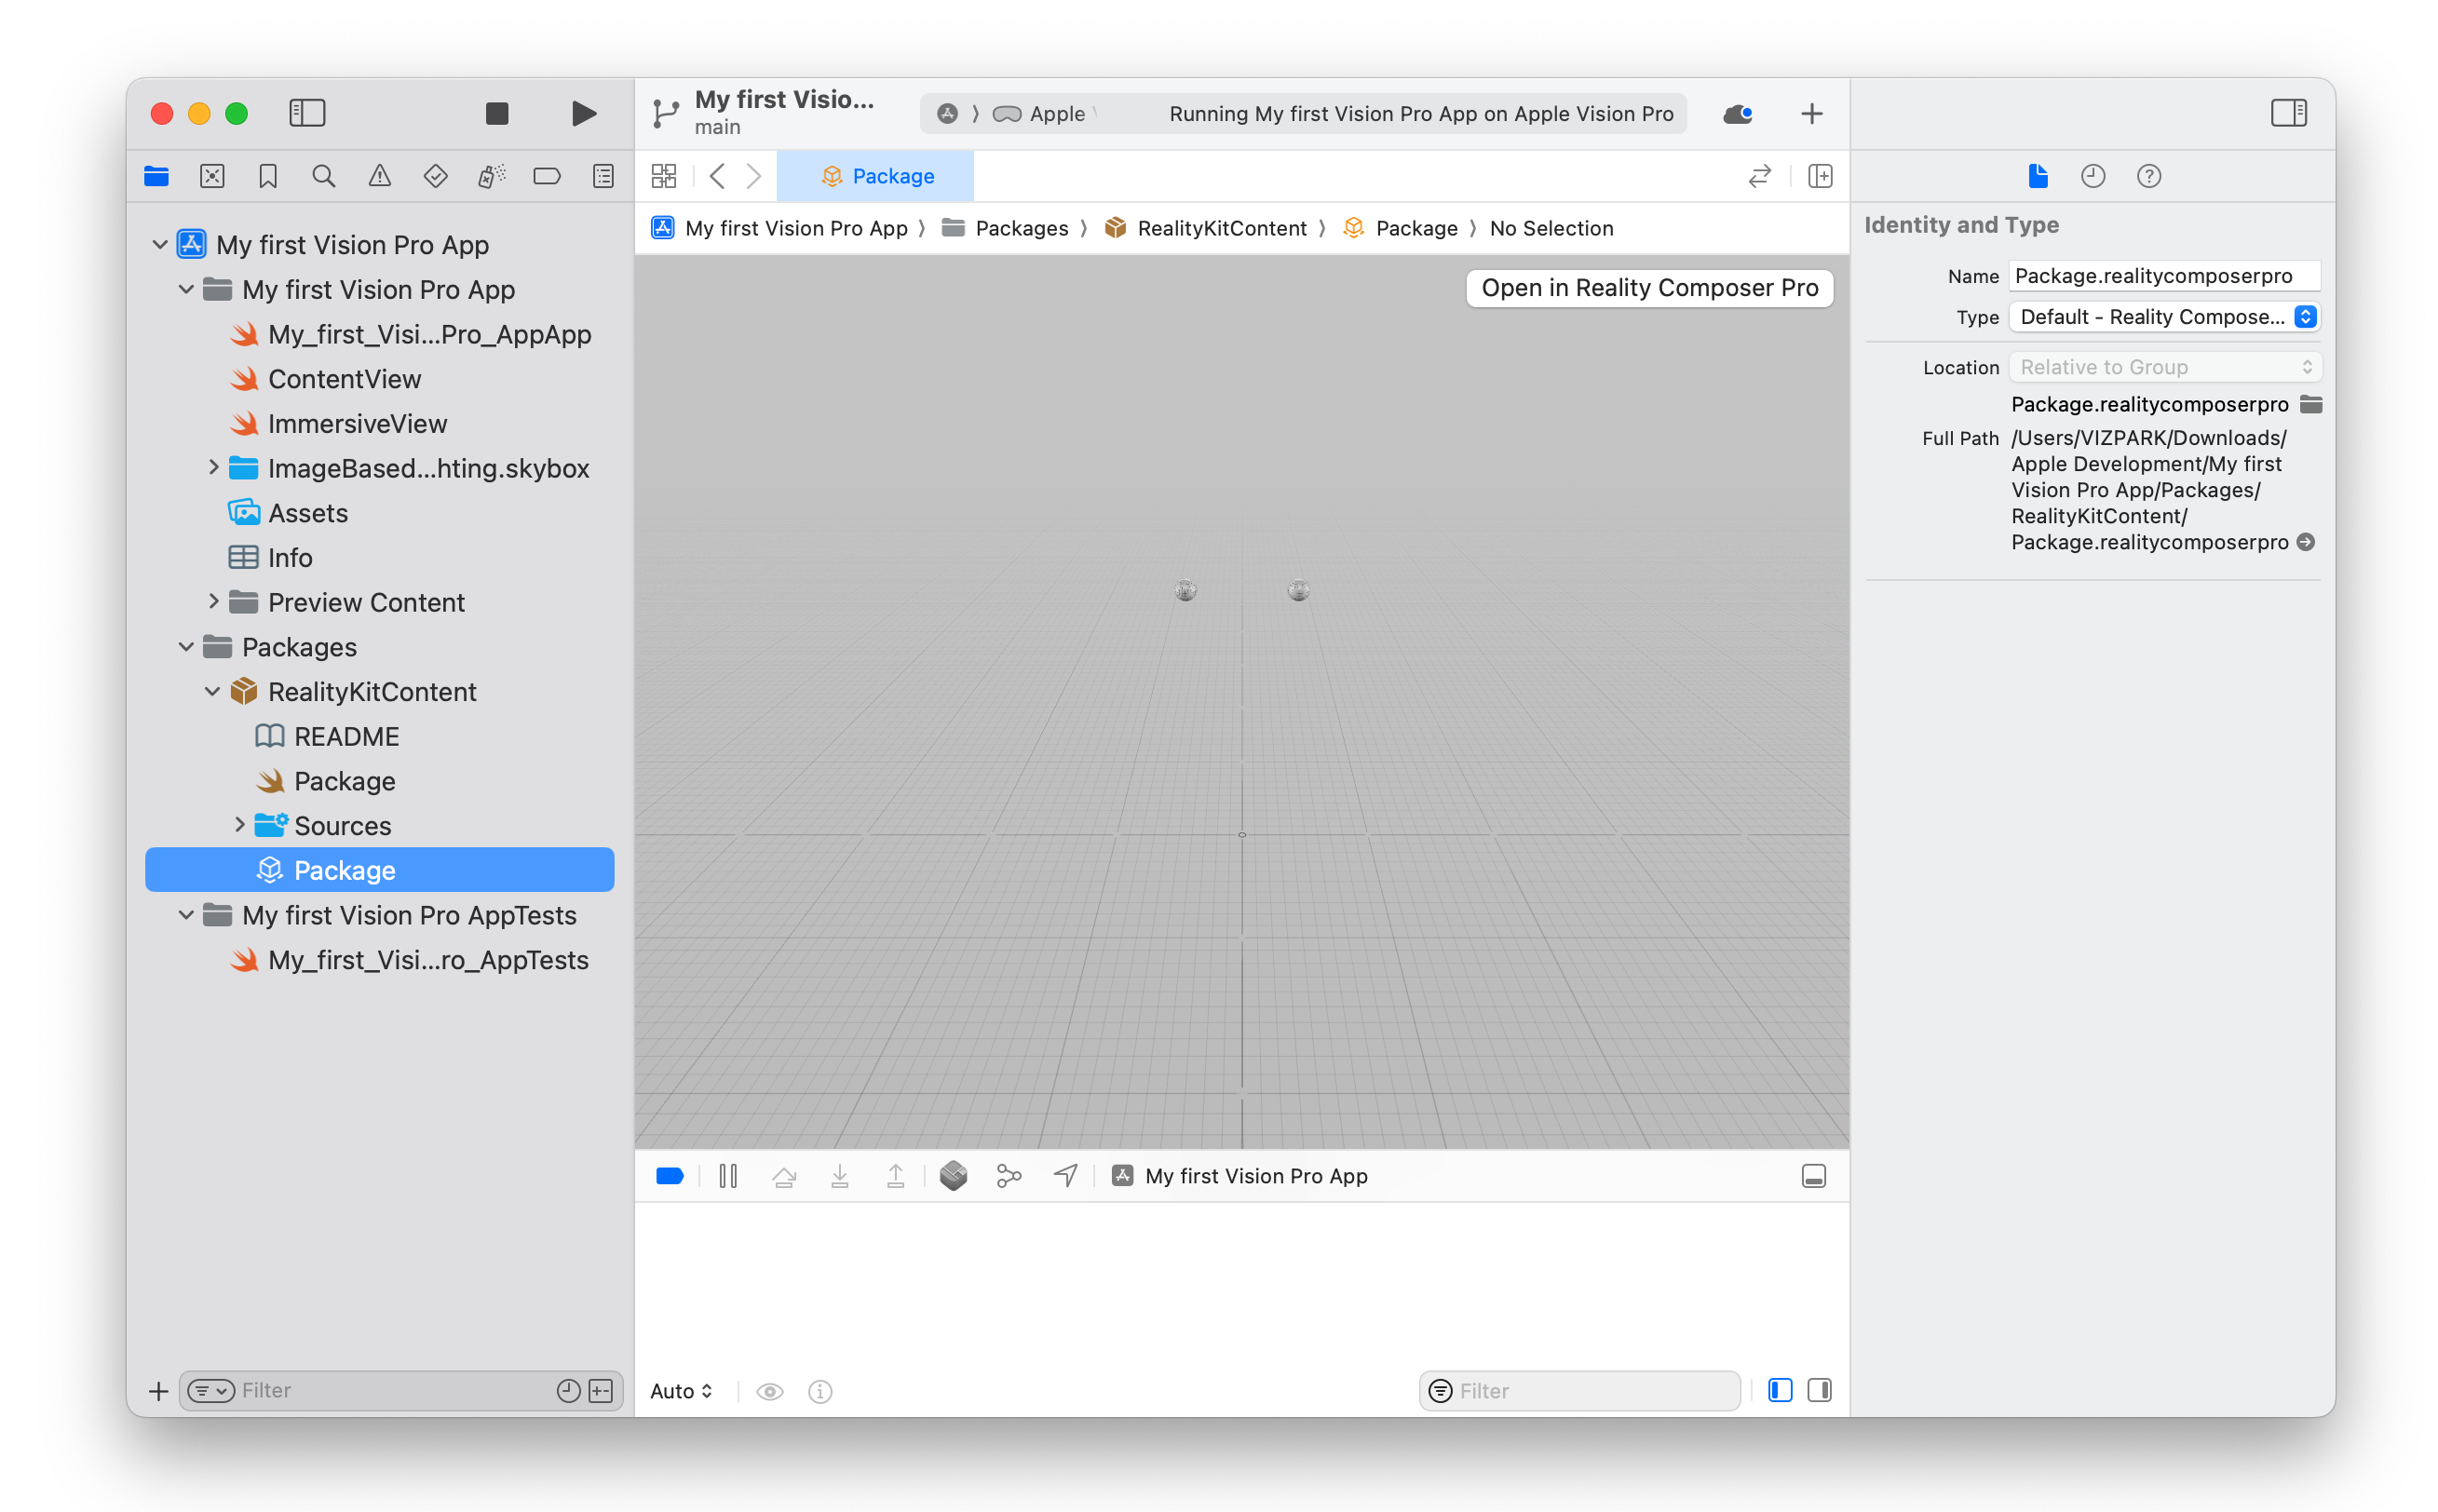
Click on the “Package” file in the Packages folder and “RealityKitContent”. This should show you the Reality Composer scene which you can now open with the “Open in Reality Composer Pro” button on the top right.
Before importing your new 3D model into this 3D scene, you need to download the USDZ model from RapidCompact. On the RapidCompact website, in your account, choose the “OPTIMIZED MODELS” section and click on the download icon of your 3D model. Choose the USDZ file and save this on your drive in any location you like.
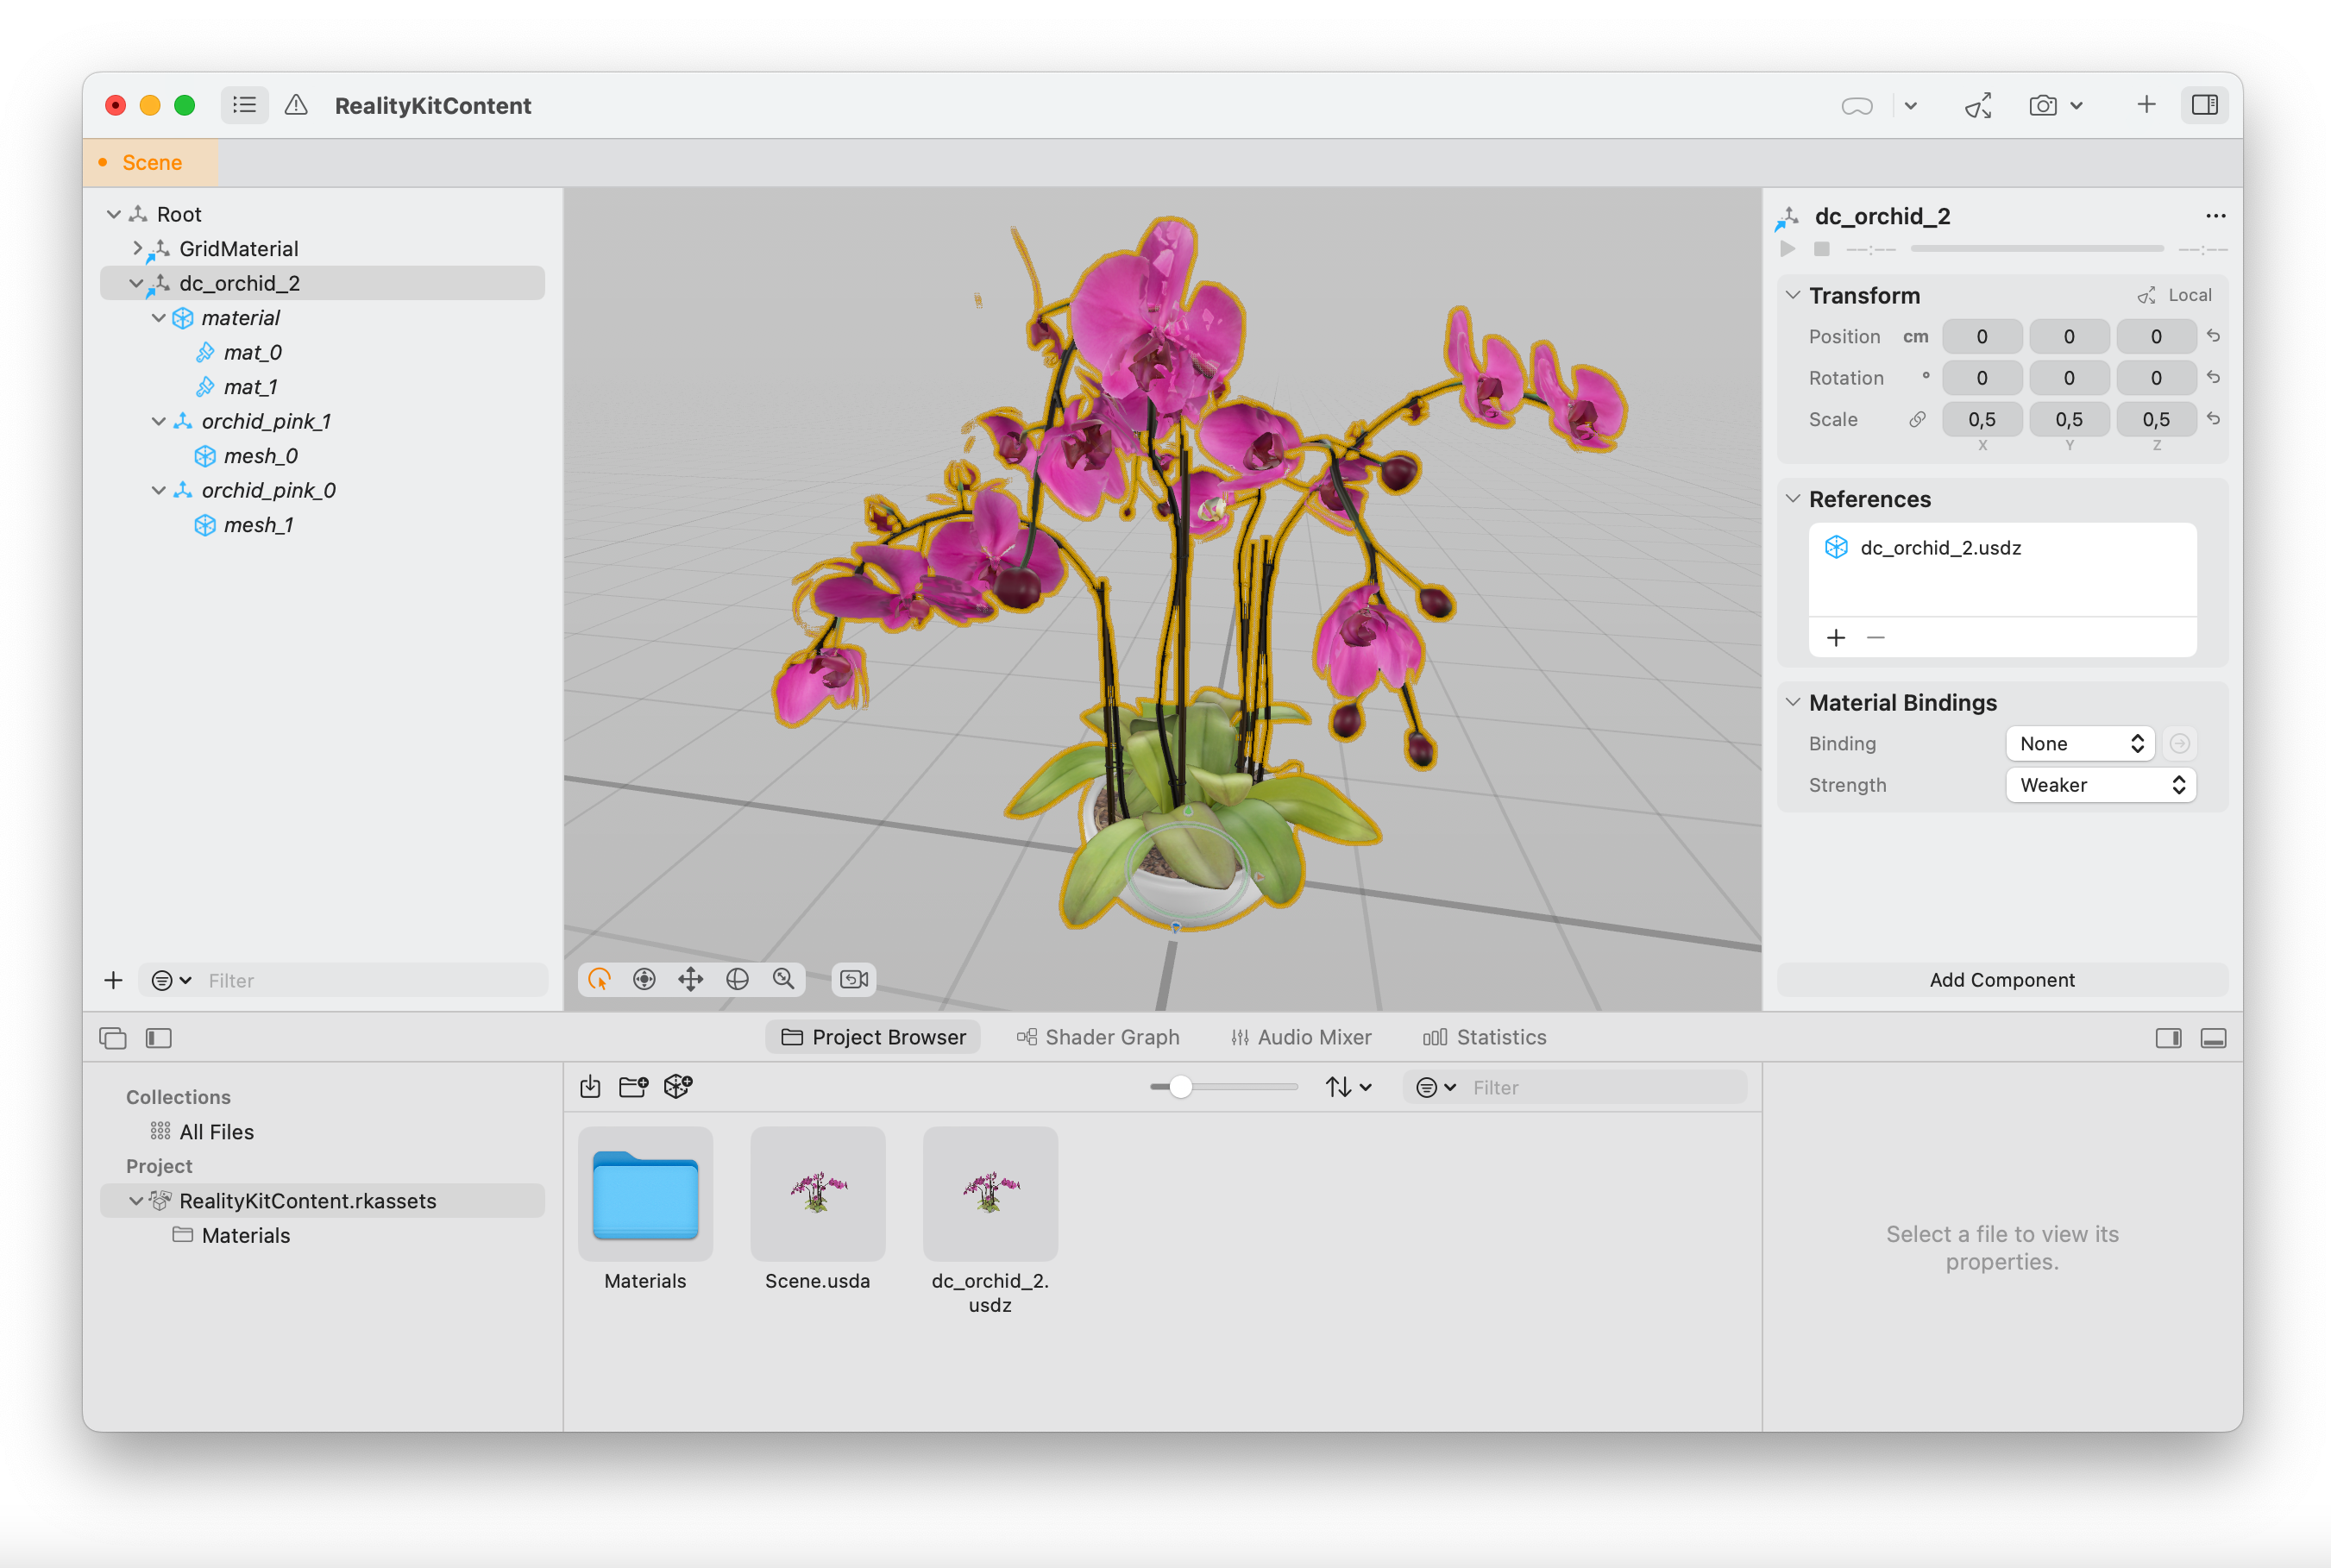
Next, choose “Import” in Reality Composer Pro from the File menu to import this USDZ model. The imported 3D model will automatically be placed into your open scene. You don’t need to drag the model to your scene. If it doesn’t appear visible right away, try zooming in or out. You may want to place the model a the scene origin (0, 0, 0) properly, which you can do with the “Transform” section on the right panel, when the 3D model is selected in your scene.
If the size is off (in our case it’s 0.01 0.01 0.01) just change the Scale parameter accordingly. If the model appears pink without materials or textures, the reason might be that the material was not assigned automatically. You can assign the material in the “Material Bindings” section on the right panel with the “Binding” parameter. Just select the correct material from the dropdown menu to fix this. Next save the scene and go back to XCode.
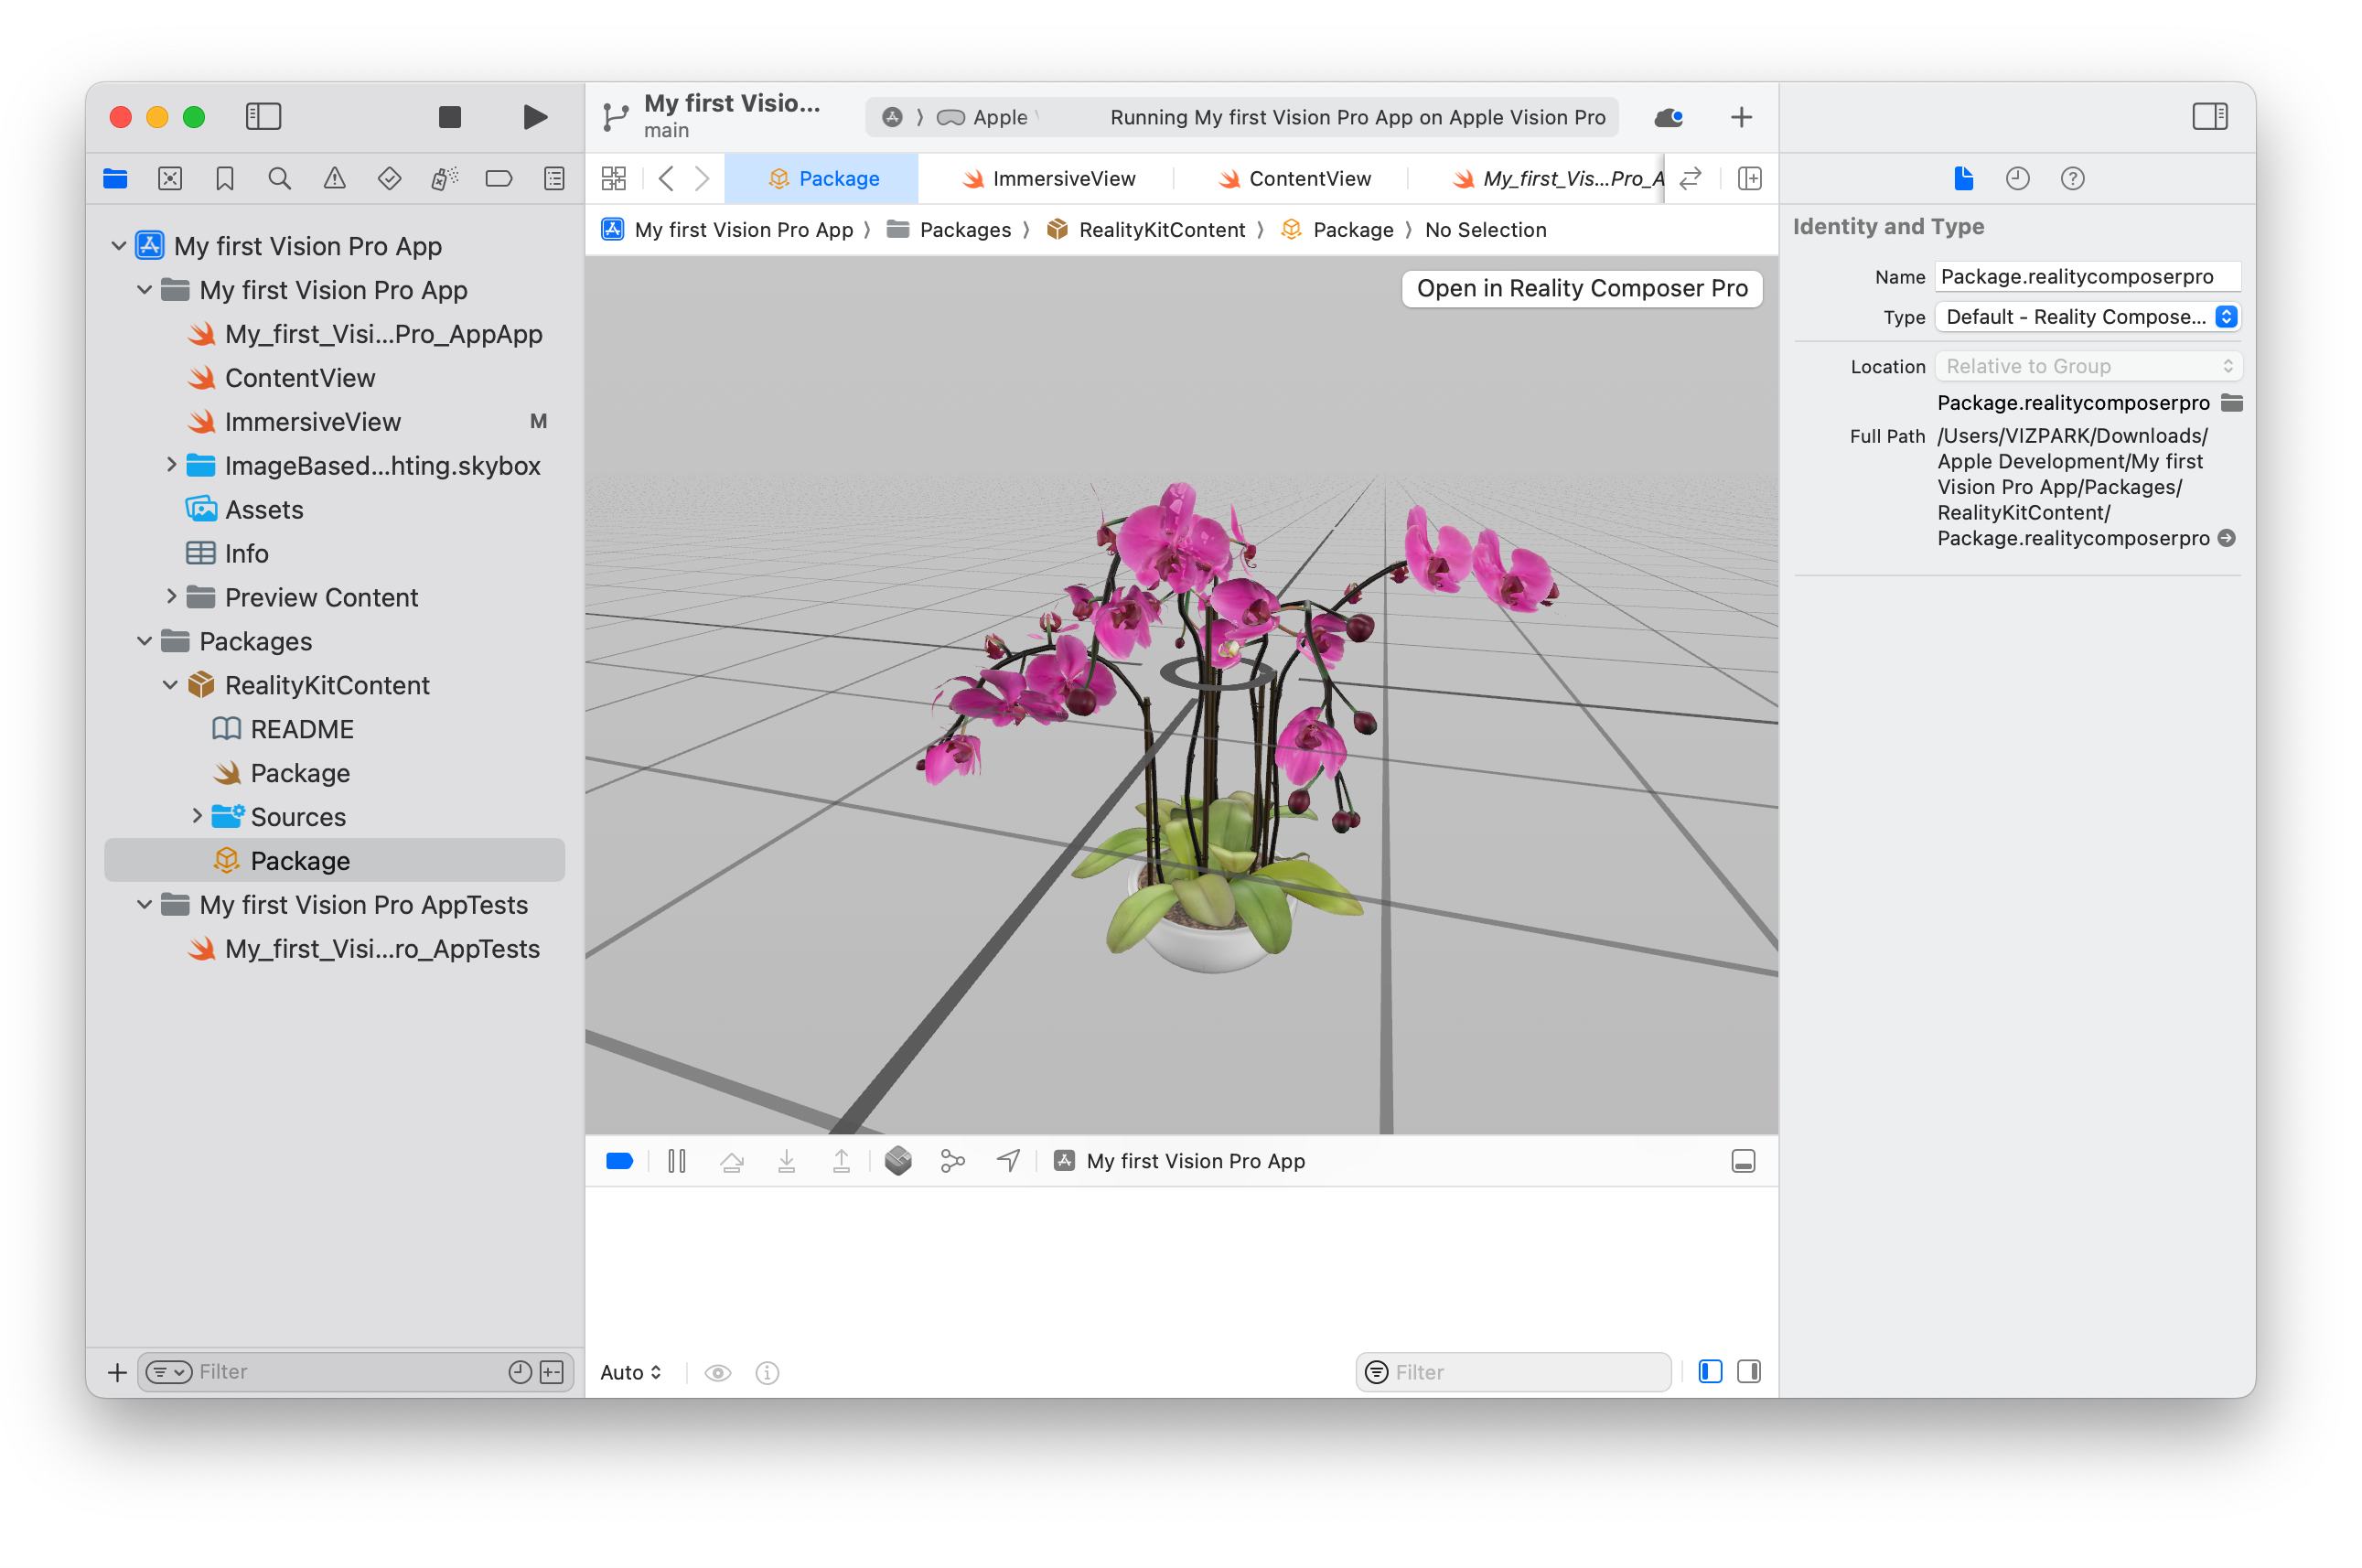
Within XCode you should now see your 3D model in the preview window when the “package” is selected that you have just edited. Click on the “Immersive View” and then the “>” button on the header to open the Simulator preview. As we can see, the 3D model is not positioned correctly and it also appears too large. To adjust the models default position and size we’ll go back to the package > Open Reality Composer Pro > adjust position and size > Save the scene > Preview again.
And that´s it for this tutorial. Gratulations, you just built a Vision Pro app! A very simple one, but with your own 3D model that you can preview in the Simulator and in the actual Vision Pro headset.
We hope that this tutorial was helpful and look forward to seeing what you build for Vision Pro…
Martin is Head of XR, Cloud and Marketing at DGG. Working with leading retailers, DGG is on a mission to automate 3D workflows for Web, mobile and XR targets - for e-commerce, and beyond. Martin is enthusiastic about everything Augmented and Virtual Reality with a 30 year background in 3D computer graphics.


Upload and process 3D models with the free web demo or get in touch if you have any question. We´re happy to help…
More about RapidCompactTry RapidCompact for FreeEnterprise Solutions