In this tutorial we will look at the new Screen Size Target as well as the concept of using optimization limits in order to ensure that certain output requirements, such as maximum number of triangles or maximum file size are met.
The screen size target allows for the optimization of 3D models to a given on screen resolution. Therefore this optimization target is based on a visual error metric in contrast to other targets such as face or vertices targets (see compact operation). But what does this actually mean for the output mesh and texture resolution?
Mesh Resolution
The mesh resolution is computed through a max deviation allowed for input vs output vertices. This is done using actual scene units (meters) and the target size on screen.
Texture Resolution
The screen size target computes the size for the textures using the Pixel per Unit Length functionality.
Example
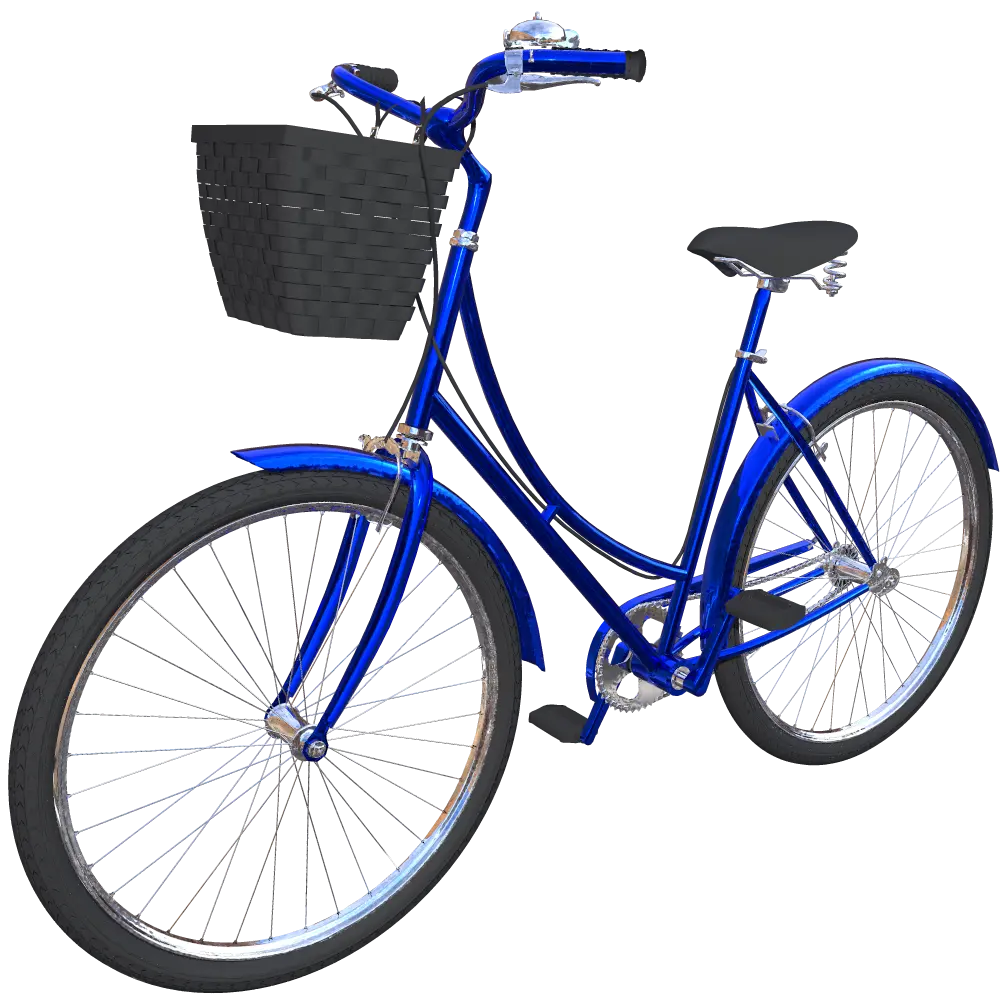
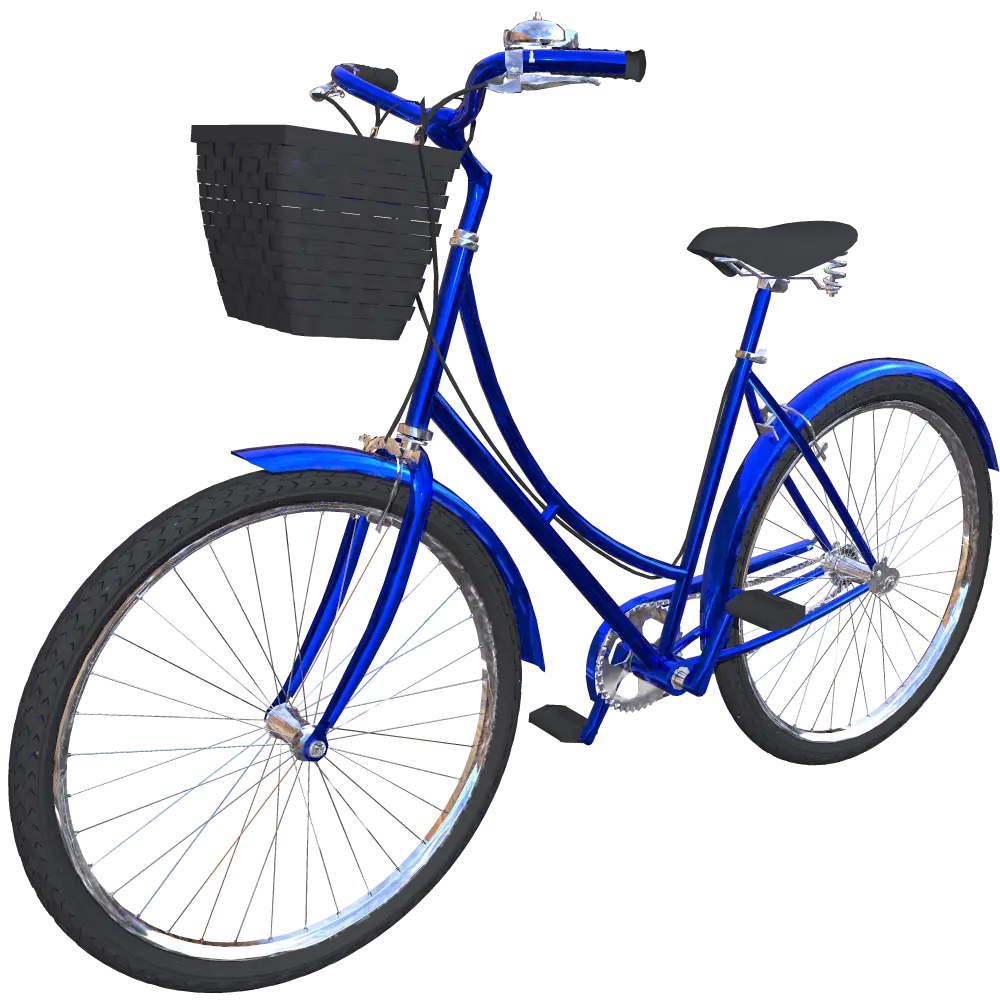
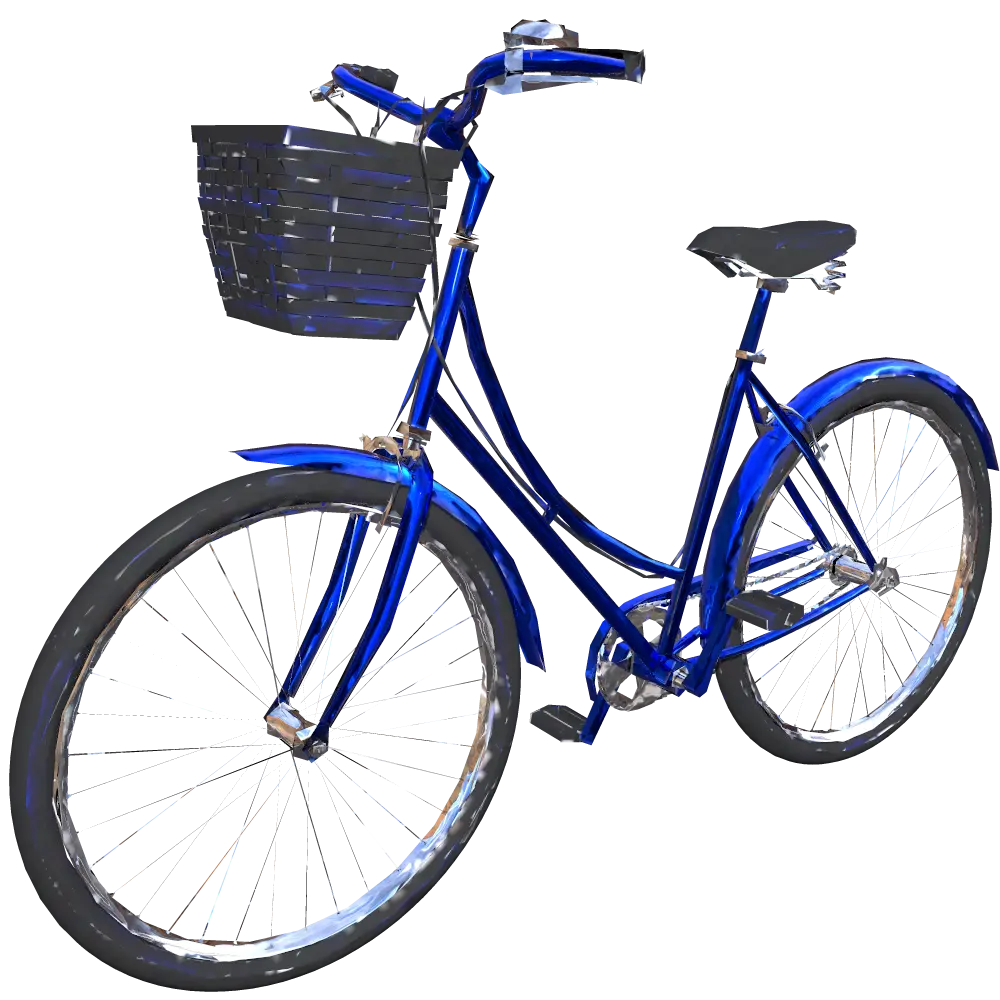
Let's start by downloading this bike model. This 3D asset has quite complex meshes and thus it serves very well as a test case for a visual quality metric such as the screen size target.
First we will use a target of 1500px, just to see how it works:
rpdx -i bike.glb -c s:1500 -e bike_s1500.glb
A target of 1500px means, that the deviation in terms of mesh and texture quality (see sections above) will produce a result which should look almost indistinguishable from the input model, if regarded in the given screen size.
The output mesh and texture resolution is quite high (133k mesh and 4k texture resolution), fitting to the quite large screen size target of 1500px.
Usually the screen size target makes most sense in the context of generating LODs. Similar as with --compact, using the screen size target and optimizing for multiple resolutions is possible:
rpdx -i bike.glb -c s:600 -e bike_s600.glb --pop -c s:300 -e bike_s300.glb --pop -c s:150 -e bike_s150.glb
As you can see below, the different LODs represent the optimal resolution for the covered screen size respectively.
Rendering of bike_s600.glb displayed on 600px screenspace:
Rendering of bike_s300.glb displayed on 300px screenspace:
Rendering of bike_s150.glb displayed on 150px screenspace:
Now once the files are loaded into the target environment, as soon as we are zooming in (e.g. in a browser-based 3D viewer) or getting close (e.g. in a XR application) to a model, the visual quality might not be sufficient anymore. This is because by zooming or getting closer the screenspace is altered and thus the model is not optimal anymore for the new given screenspace.
In order to enable changing the LOD per given size on screen a LOD switching functionality inside the target application or WebGL framework is needed.
The screenspace target also accepts additional constraints such as preservation of UVs. In this particular case the latter setting would be one way to avoid baking the texture maps and preserve the Material Colors from the input instead.
In some cases it can make sense to only rely on a max deviation for meshes. Especially if texture compression and resolution is already controlled by other settings and thus should not be altered by any functionality such as screen size target.
rpdx -i bike.glb -c d:0.07% -e bike_d007.glb
In this case with the example of a desired 1500 screen size, the deviation target has to be d:0.07 as 100/1500 = 0.0666.
In this section we will go over the concept of optimization limits. Usually when optimizing a 3D model with RapidCompact a specific optimization target, such as a face (triangle), vertices or MB target is specified.
With the introduction of the screen size target there might be the need to instead apply an additional limit for the mesh or texture resolution of the ouput files, so that the requirements of a given target application or environment are still met. This is especially useful in an automated context when running a batch process with multiple models and possibly different levels of detail and complexity of each input model.
To apply limits to a given optimization target, either the commandline or the decimation default target setting file can be utilized:
| Name | Type | Default | Valid Range | Quick Description |
|---|---|---|---|---|
| decimation:defaultTarget | String | f:20000 | target parameter for decimation during compact |
Let's go ahead with the commandline option and apply limits to the same command we have used at the very beginning:
rpdx -i bike.glb -c 's:1500,f:100000' -e bike_s1500.glb
Alternatively the decimation default target setting can be adressed either in the commandline:
rpdx -i bike.glb -s decimation:defaultTarget 's:1500,f:100000' -c -e bike_s1500.glb
or by loading a configuration file containing the altered setting, such as this one:
rpdx -i bike.glb --read_config optimization-limits.json -c -e bike_s1500.glb
As you can see the output is now limited to 100k faces instead of targeting a specific resolution. Now if multiple files will be run with this set-up, some files will be allowed to be under that limit as well, depending on the targeted screen size resolution and model complexity.
Optimization limits can also be combined. For example, let's take the bike model again and in addition add a MegaByte limitation as well:
rpdx -i bike.glb -c 's:1500,f:100000,10mb' -e bike_s1500.glb
Now the output will conform not only to the 100k faces limit but also will not be larger then 10mb in file size.